This article describes how to set up the backup of VCSA to a Synology NAS. The setup is relatively simple and quick.
We all know how important a working backup is. The same applies to the backup of the VCSA appliance.
***** UPDATED on JUN21th 2023 *****
***** with current Synology 7.2 and vCenter 8.0.1 release *****
The protocols supported for backup are FTPS, HTTPS, SFTP, FTP, NFS, SMB and HTTP.
I use a Synology NAS in my home lab which supports FTPS among other things. To set up the backup, some preparations have to be made on the NAS.
The following steps must be completed as preparation:
- Set up shared folder on NAS
- Create and authorize users on NAS
- Activate FTPS service
Set up shared folder on NAS
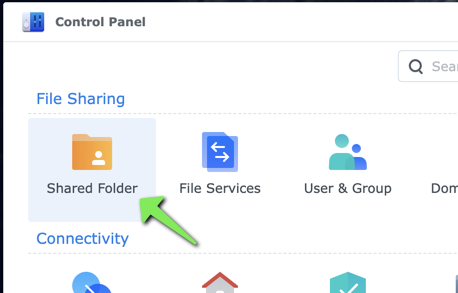
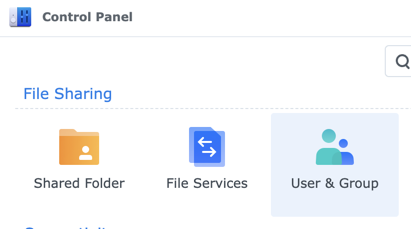
- Log in to the NAS and go to the control panel. Then click Shared Folder
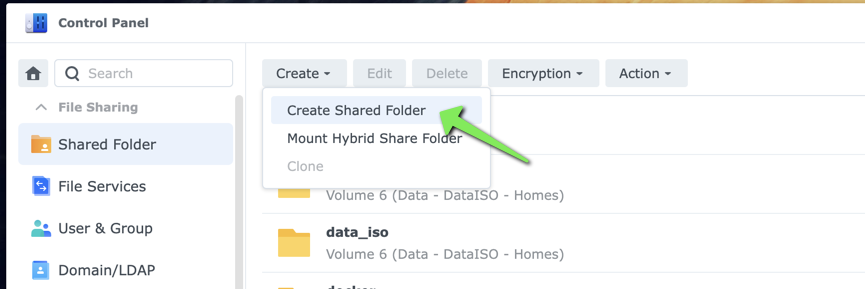
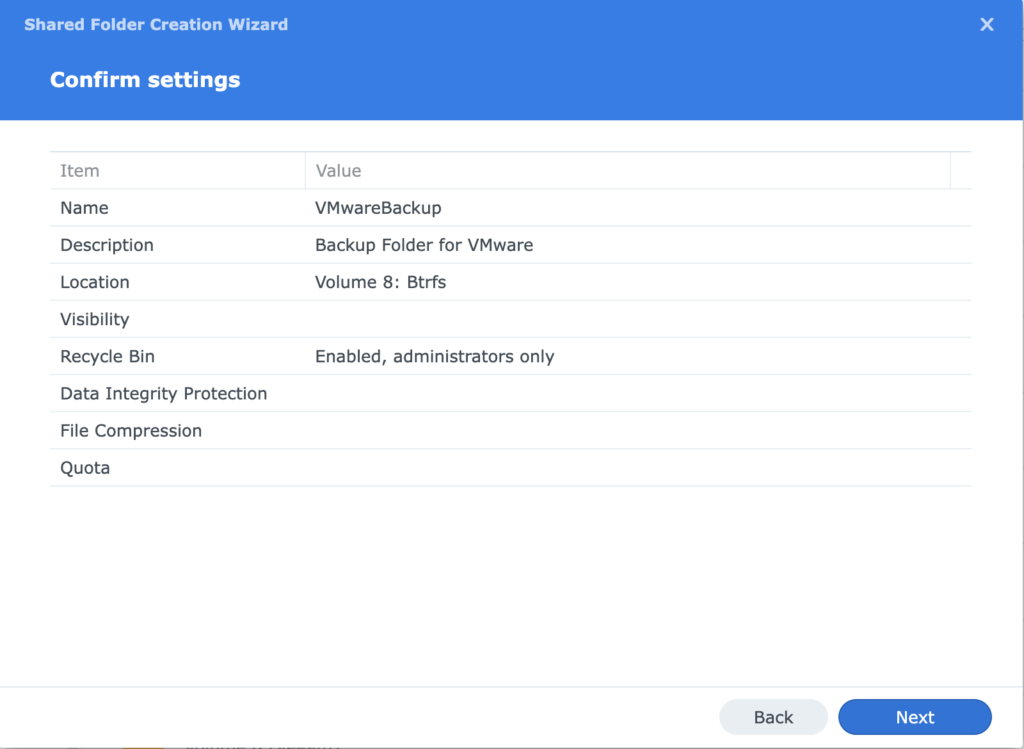
- Click on Create and then Create Shared Folder
- Enter a name and, if necessary, a description and then select a volume. All other values can be kept.
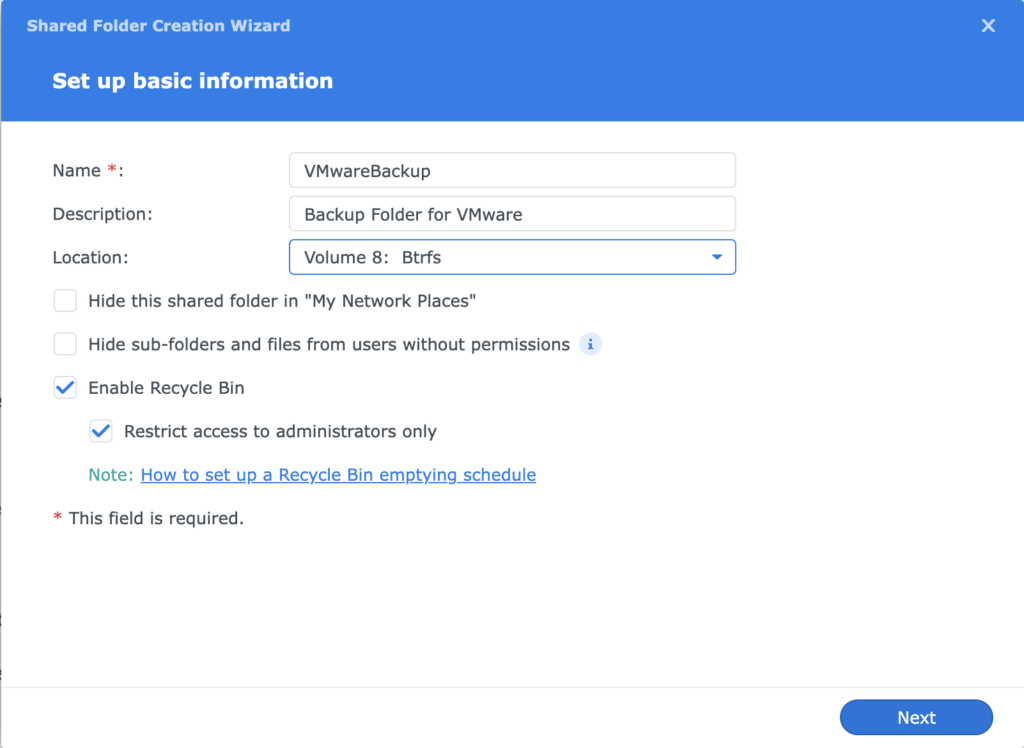
- All other windows can be confirmed with Next.
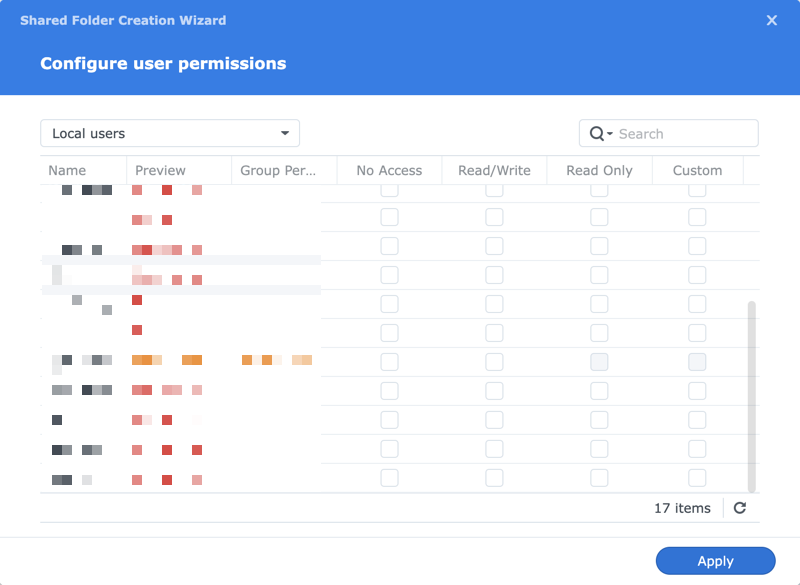
- Since no user has been created yet, apply can also be clicked to apply.
Create and authorize users on NAS
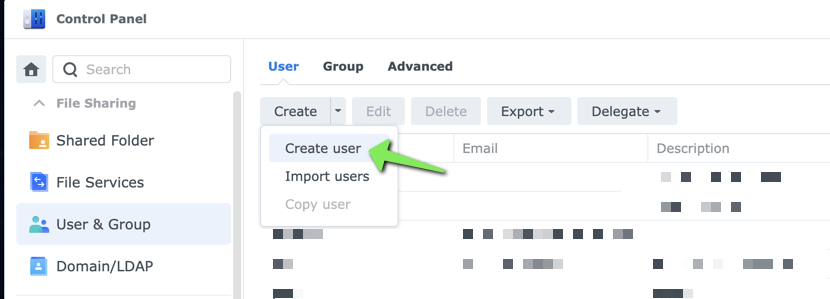
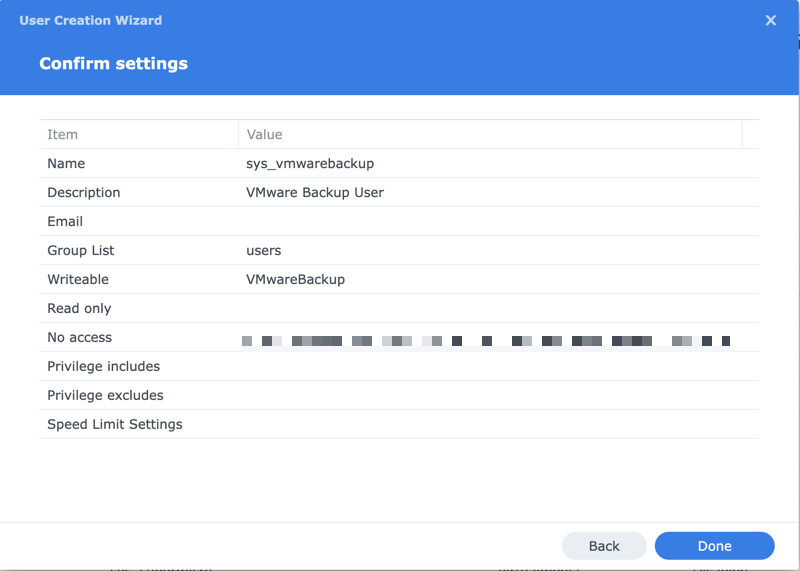
- The second step is to create a user for the backup. To do this, select User & Group in the Control Panel.
- Next select Create and Create User
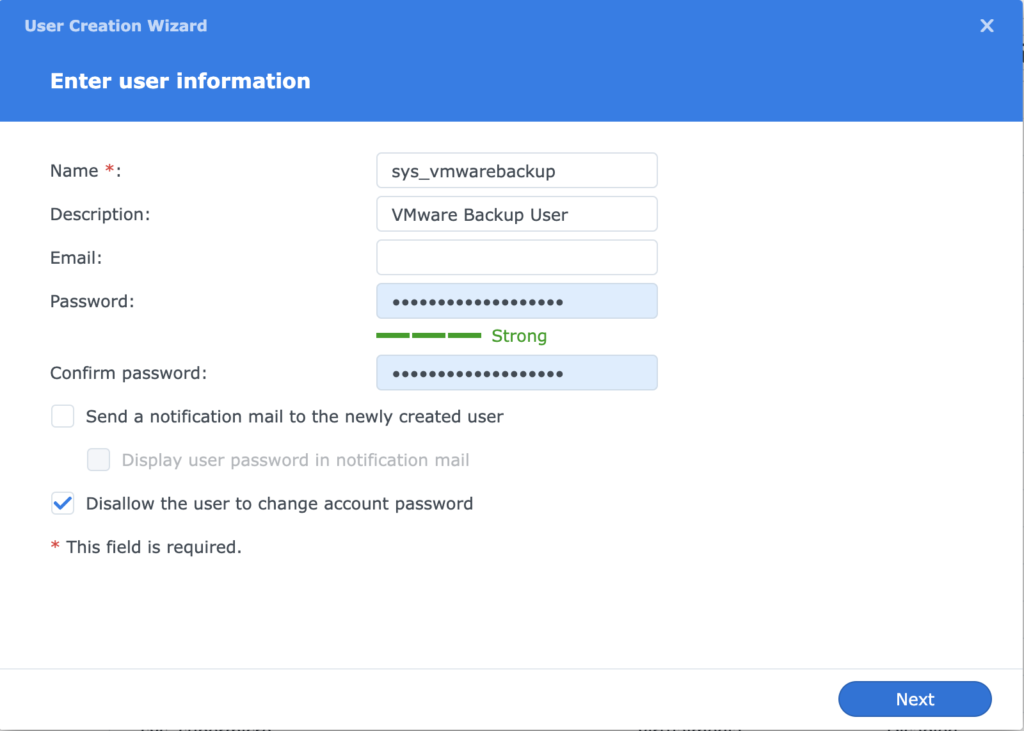
- Here user name, description and a password are required.
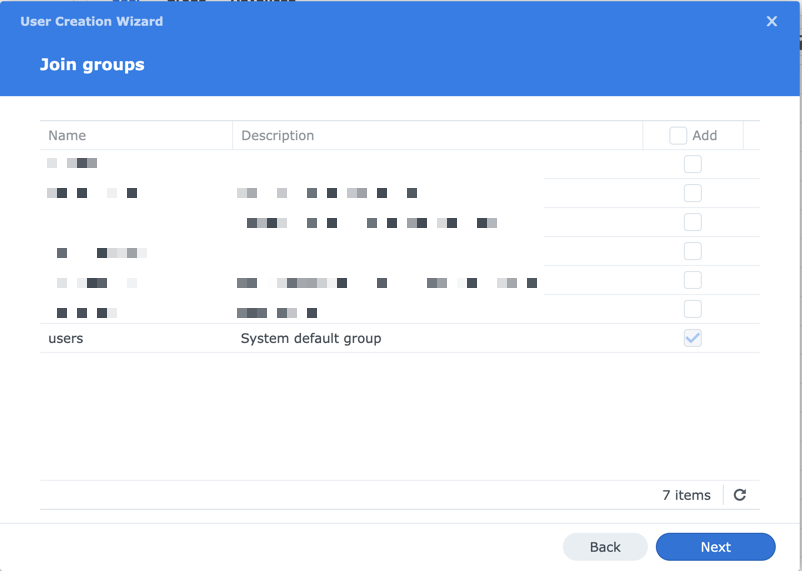
- The group user is actually considered the only required group
- Authorize the previously created directory with read/write for the user
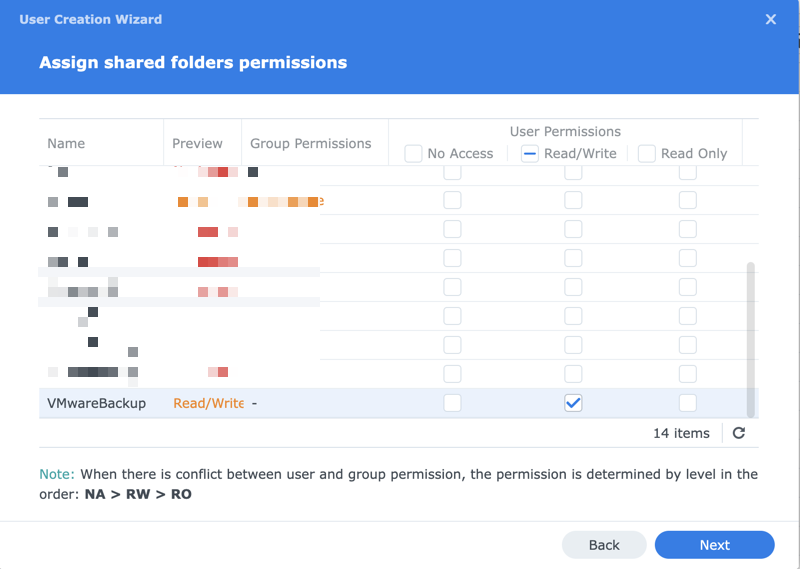
- Finally confirm with Done
Activate FTPS service
- Activating the FTPS service is simple. To do this, select File Services in the Control Panel and activate the FTPS service under FTP and confirm below.

Configure Backup
Now we can start to configure the backup.
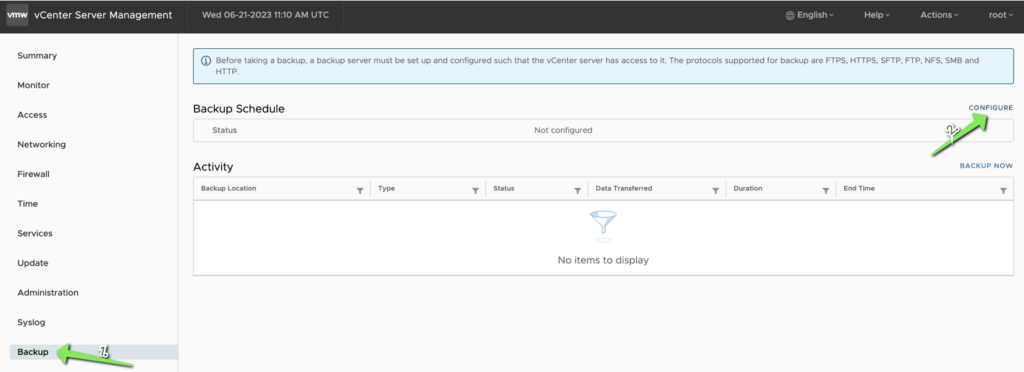
- Browse to the VAMI of your vCenter https://vcenterIP-or-Hostname:5480/ and login with root
- Then go to Backup and Configure
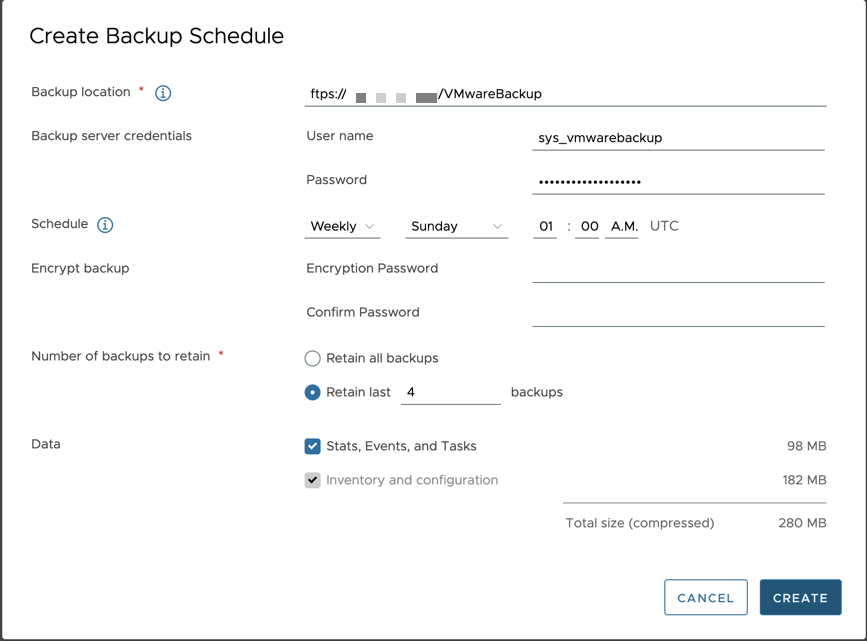
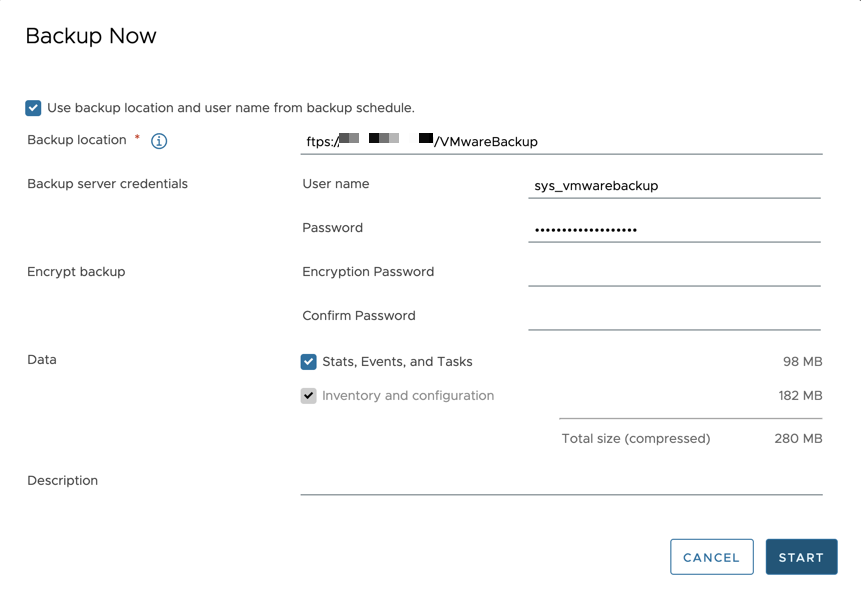
- For the backup location use ftps://IP-or-Hostname-of-NAS/VMwareBackup and the User and Password created before on the NAS.
- You can use a schedule for daily, weekly or monthly backups
- It is optional to encrypt the backups
- It is possible to keep a number all backups. I want to keep the last 4 backups and the older backups should be deleted.
- Last point is to choose to include oder exclude Stats, Events and Tasks
- After the creation the job will be visible in the schedule.
- To test the backup, click on Backup Now.
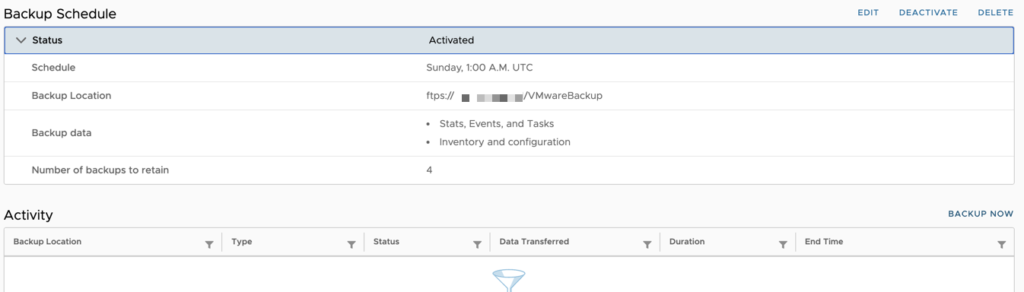
- You can select used backup location. Unfortunately, the data for the user and the password are not taken over and must be entered again. After entering the data, click Start.

- After the backup is completed, it will be displayed as completed under Activity.
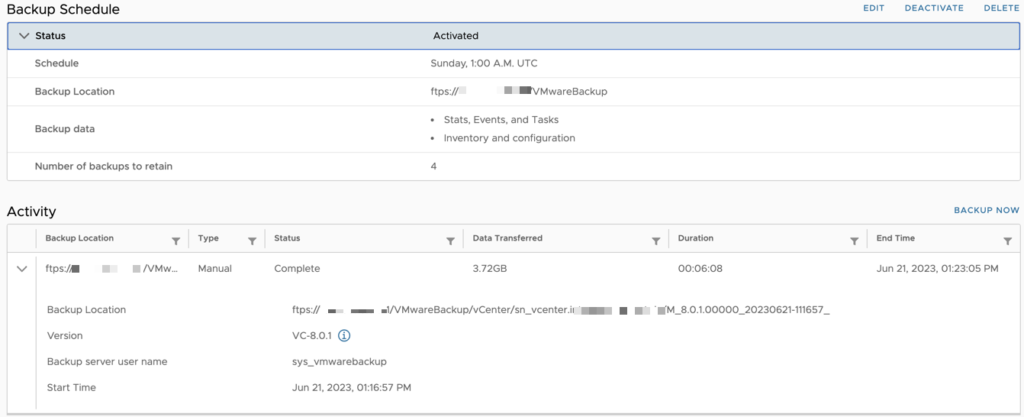
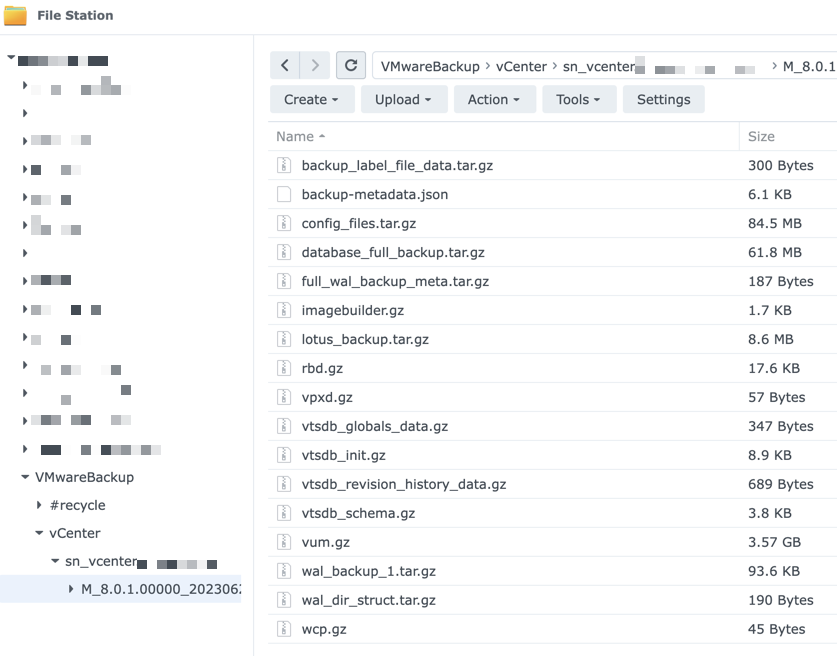
- In the Synology NAS, the backed up data can be found in the share under vCenter\sn_FQDN-of-vCenter\version-and-date.