The Unified Access Gateway (UAG) can be used as gateway or reverse proxy and enables access to EUC products.
Using VMware’s powershell scripts, a new UAG can be quickly deployed or an older version can be replaced in minutes. Typically, this can be done without a user noticing.
This article is not written on a fixed version of the UAG. Rather, this manual can be used for almost all versions. The only thing to note is that new functions in old configuration backups (.ini) are not preconfigured and may therefore be active after the first start. I had such a “bug” so the TLS1.3 support was added. Our load balancer didn’t get along with it at all and the service kept flipping from active to down.
I have tested my own manual with the following versions of the UAG:
- 3.9
- 3.9.1
- 3.10
- 20.09
Preparation
- Go to VMware Product Interoperability Matrices and check if your products are compatible with the version you want to install.
- Download OVF Tool code.vmware.com
- Download both UAG.ova and PowerShell Scripts – my.vmware.com
Select your desired version and click on “Go to Downloads”
Then download the OVA and the Scripts - Install the OVF Tool to your workstation.
In addition the following data from your environment are needed:
- IP Address(es) of your existing UAG
- vCenter FQDN
- vCenter/AD User with permission to create/import VMs
- Certificate chain and key files in .pem format, or use the .P12 or .PFX extension
Export .INI from UAG
The first step is to export the INI file of the existing UAG
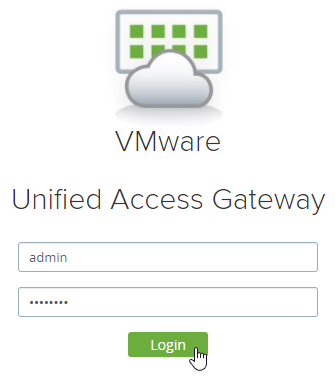
For this we log in with the admin user on https://.
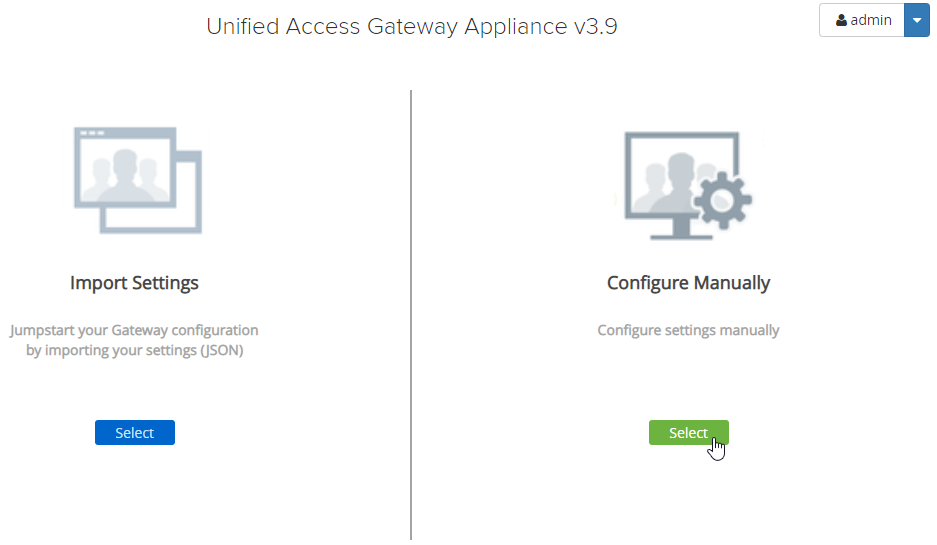
Select Configure Manually
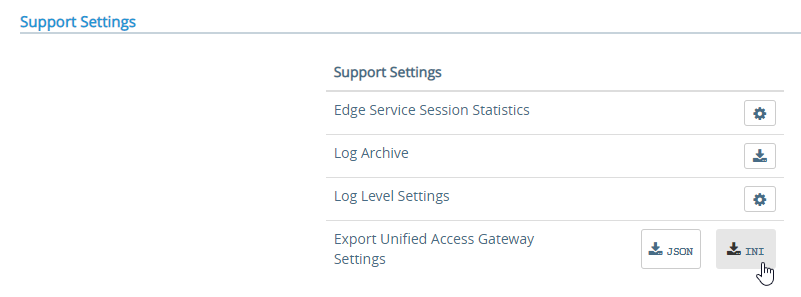
Scroll down to Support Settings an click on INI to export the UAG settings
Customize ini file
The exported INI file must now be supplemented by some entries.
The following entries must be added:
- source – Path to OVA
- target – e.g vi://vcenteraddr/Datacenter/host/Cluster
- folder – optional e.g DMZ/ (if you want to add to a folder)
- ds – the datastore name
- name – VM name in vCenter
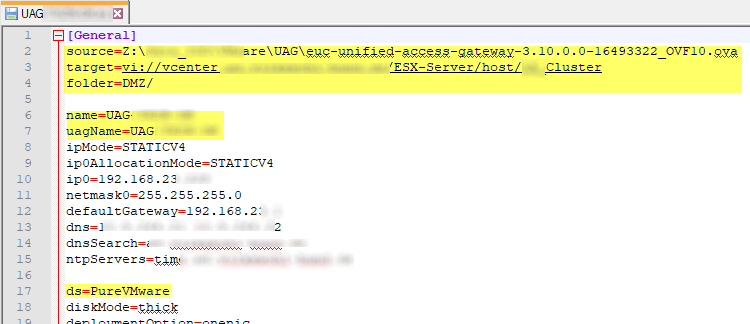
To add a certificate, the path to the encrypted PFX file must be added

- [SSLCerts]
pfxCerts – Path to PFX Cert not encrypted
Disable UAG node
If you are using a load balancer and it is configured with the monitor for the favicon.ico, you can now prevent reconnection to this UAG by activating the Quiesce Mode. After that you only have to wait for all existing connections to be disconnected.
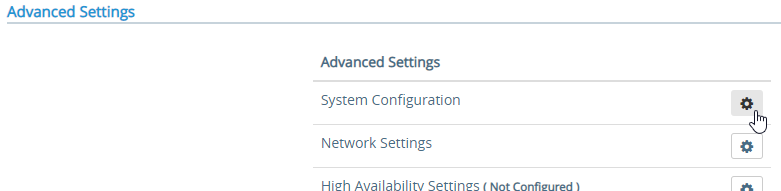
Scroll down to Advanced Settings an click on System Configuration
Activate the Quiesce Mode by switching to YES
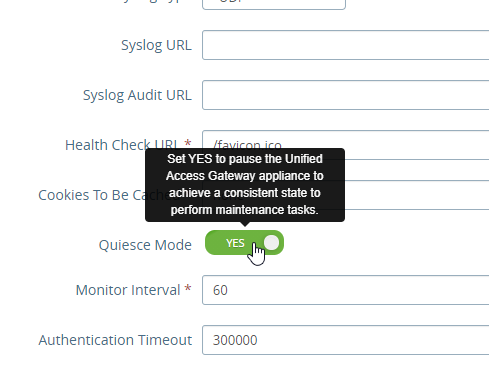
Now you only have to wait for all connections to be closed.
I would recommend to deactivate the node in the load balancer after that. In my Finishing part I describe a problem I had when I didn’t do this.
Deployment
To start the deployment, the uagdeploy.ps1 is executed with the switch and the path to the INI file

The deployment now asks for the passwords for root and admin users.

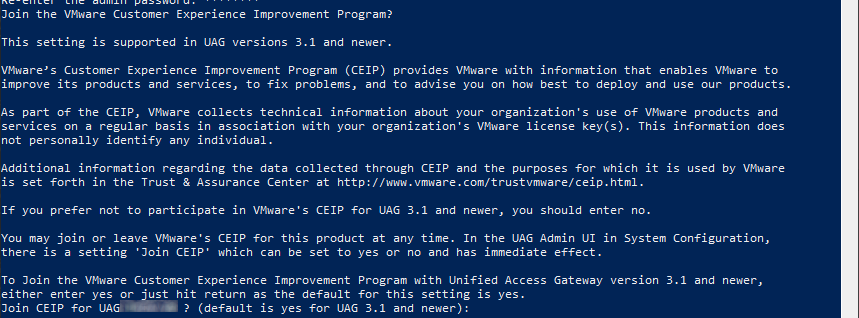
Then, it must be decided whether to participate in the CEIP (yes) or not (no).
If a certificate is also installed, the password must now be entered.

Finally, the user and password for connecting to vCenter must be entered.
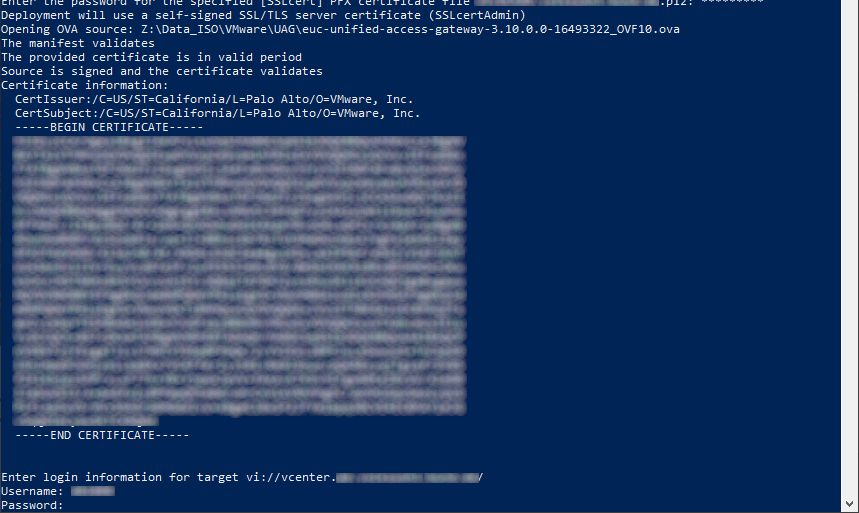
If all data is correct and the paths are available, the deployment begins.

Once the OVA has been imported, the VM is started and the deployment waits for the VM to report back over the IP.

As soon as the IP address is reachable, the deployment is complete.

Finishing
Log in to the new UAG.
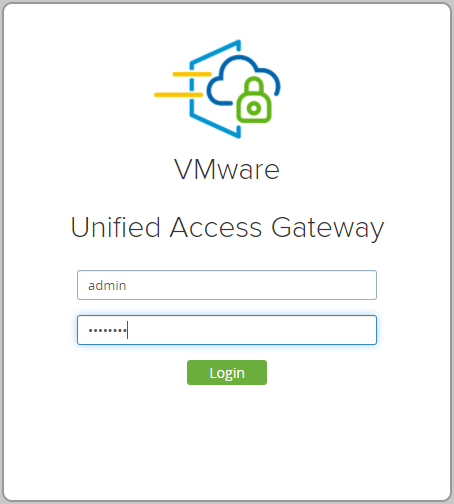
Go to Configure Manually and click on SELECT.

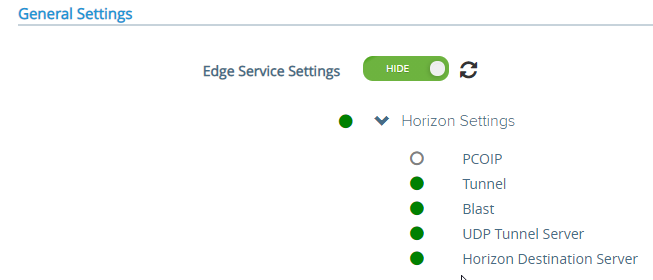
First open the Edge Service Settings and check if e.g. the Horizon connection has become green again.
Now we come to the slightly annoying part.
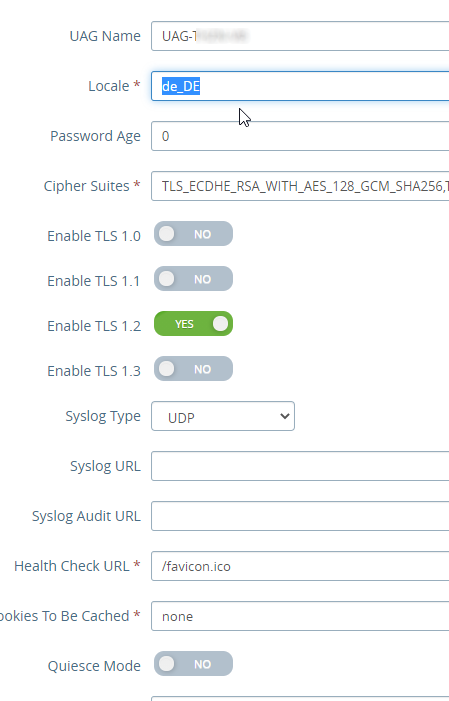
Because some settings from the INI file are not used, some settings have to be done manually.
The most noticeable is the Quiesce Mode and the Locale setting.
Unfortunately the Quiesce Mode is disabled again, so you have to be careful and deactivate this node on the load balancer before.
The Locale setting is also not used and so I had to set the value to de_DE myself.
New features such as TLS1.3 are also active by default and may cause problems if they do not support it, depending on the load balancer. Our service then flapped constantly.
Summary
Considering the few adjustments that are necessary, upgrading of UAG can be done very easily with this method.
My recommendation is to test this several times with an additional UAG until you have adopted all your settings or documented the manual steps.
From then on there is no faster way to deploy.