To update your VCSA follow the steps below. The pictures maybe show different version numbers, but I’ve tested it with the listed versions.
Preparation:
- Check all dependencies! Go to VMware Product Interoperability Matrices and check for example the Interoperability of VMware NSX and vCenter. Maybe you need one interim step for your update/upgrade.
Installation:
If your appliance don’t have a connection to the internet you will have to download the FullPatch from VMware.
- Select VC and 6.5.0
- Select the FP file for the appliance (example)
- VCSA 6.5 Update 1e (VMware-vCenter-Server-Appliance-6.5.0.14000-7515524-patch-FP.iso)
- Mount the ISO to you vCenter Server Appliance
- Select Check CDROM instead of Repository in my guide.
With internet connection follow these few steps
- Login to the appliance management (VAMI) https://your.vcenter.appliance:5480
- Go to Update and click on Check Updates and then Check Repository (or CDROM for those who install from ISO)
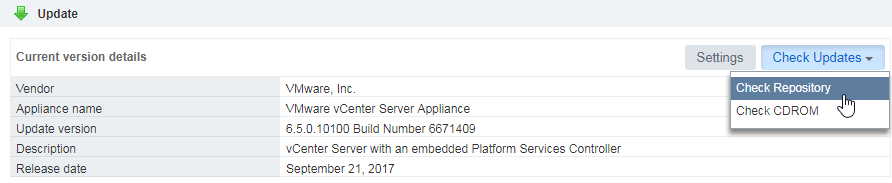
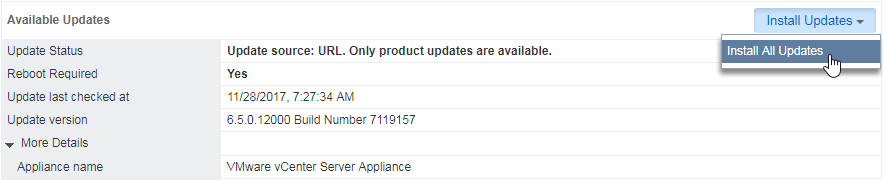
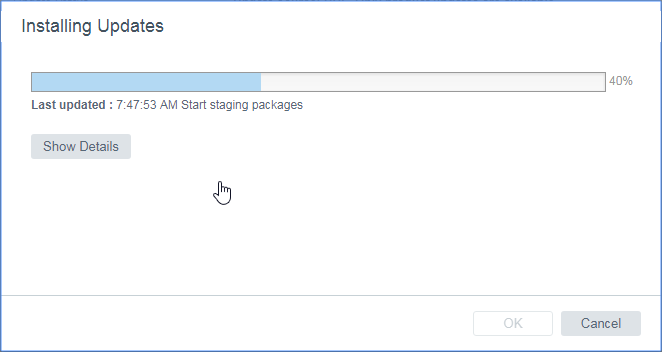
- After that the Appliance should show you the new update. Click on Install Update and then Install All Updates
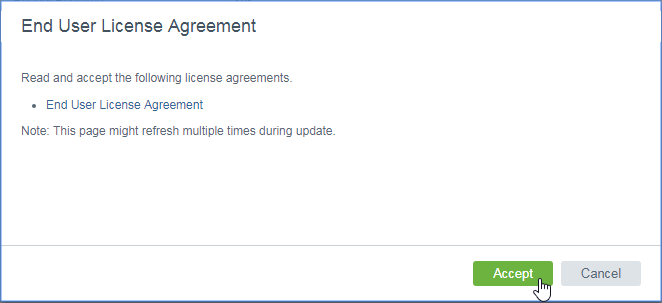
- Accept the License Agreement and click Install
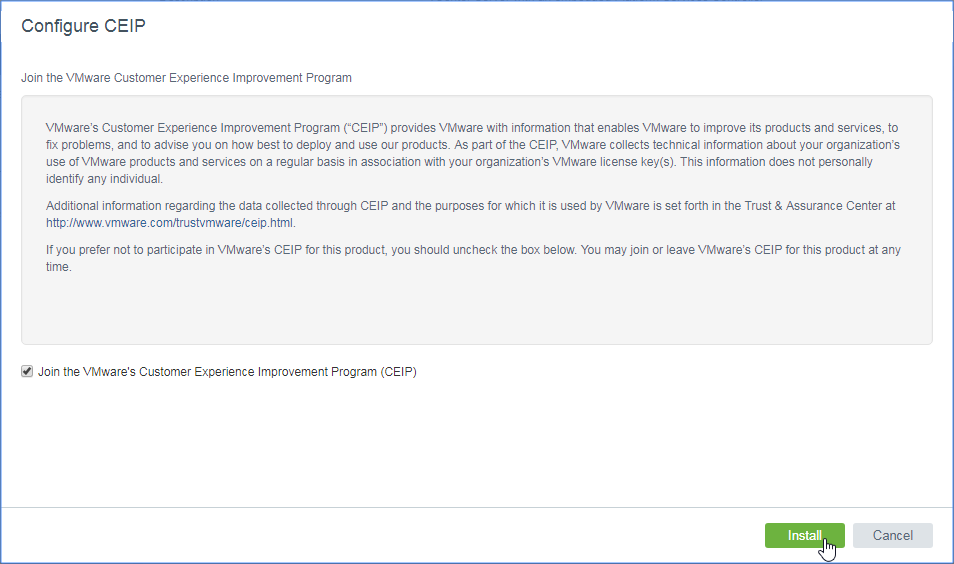
- [optional] Join or leave the CEIP (Customer Experience Improvement Program) and click on Install
- After that the update will run several minutes.
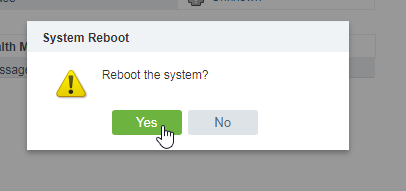
- The last step you have to do is to reboot the appliance

- Go to the Summary Tab and click on Reboot

- After initialization the vCenter Server appliance is back online and ready for work
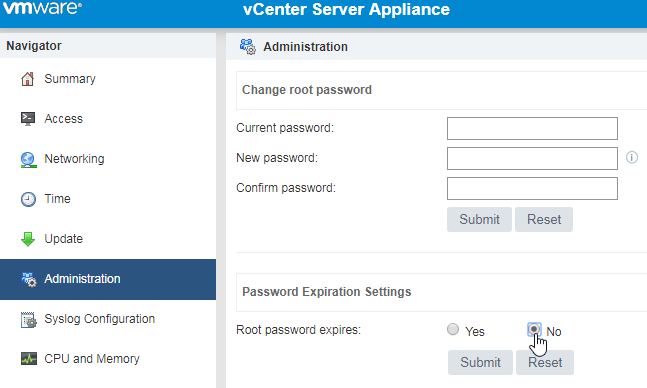
- If you have select that root password doesn’t expire you have to set this again. Every update activates the expiration of root.
UPDATE: With vCenter Server Update 1d / Update 1e / Update 1f the root expiration was still disabled after the update.
Maybe VMware now check the setting and keeps it. But I would recommend to check it after every update
Leave a Reply