
To update your VCSA follow the steps below. The pictures maybe show different version numbers, but I’ve tested it with the listed versions.
Tested with:
- VCSA 6.7.0 (6.7.0.10000 Build 8217866)
- VCSA 6.7.0a (6.7.0.11000 Build 8546234)
- VCSA 6.7.0b (6.7.0.12000 Build 8832884)
- VCSA 6.7.0c (6.7.0.13000 Build 9232925)
Preparation:
- Check all dependencies! Go to VMware Product Interoperability Matrices and check for example the Interoperability of VMware NSX and vCenter. Maybe you need one interim step for your update/upgrade.
Installation:
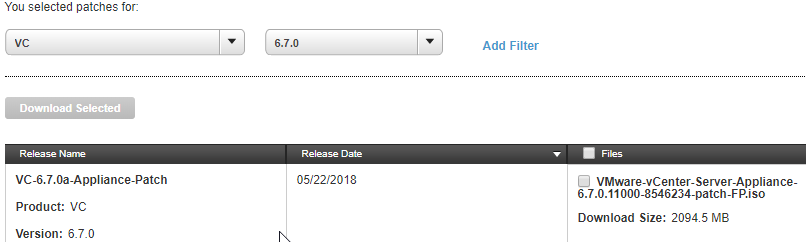
If your appliance don’t have a connection to the internet you will have to download the FullPatch from VMware.
- Select VC and 6.7.0
- Select the FP file for the appliance (example)
- VCSA 6.7.0a (VMware-vCenter-Server-Appliance-6.7.0.11000-8546234-patch-FP.iso)
- VCSA 6.7.0a (VMware-vCenter-Server-Appliance-6.7.0.11000-8546234-patch-FP.iso)
- Mount the ISO to you vCenter Server Appliance
- Select Check CDROM instead of Repository in this guide.
With internet connection follow these few steps
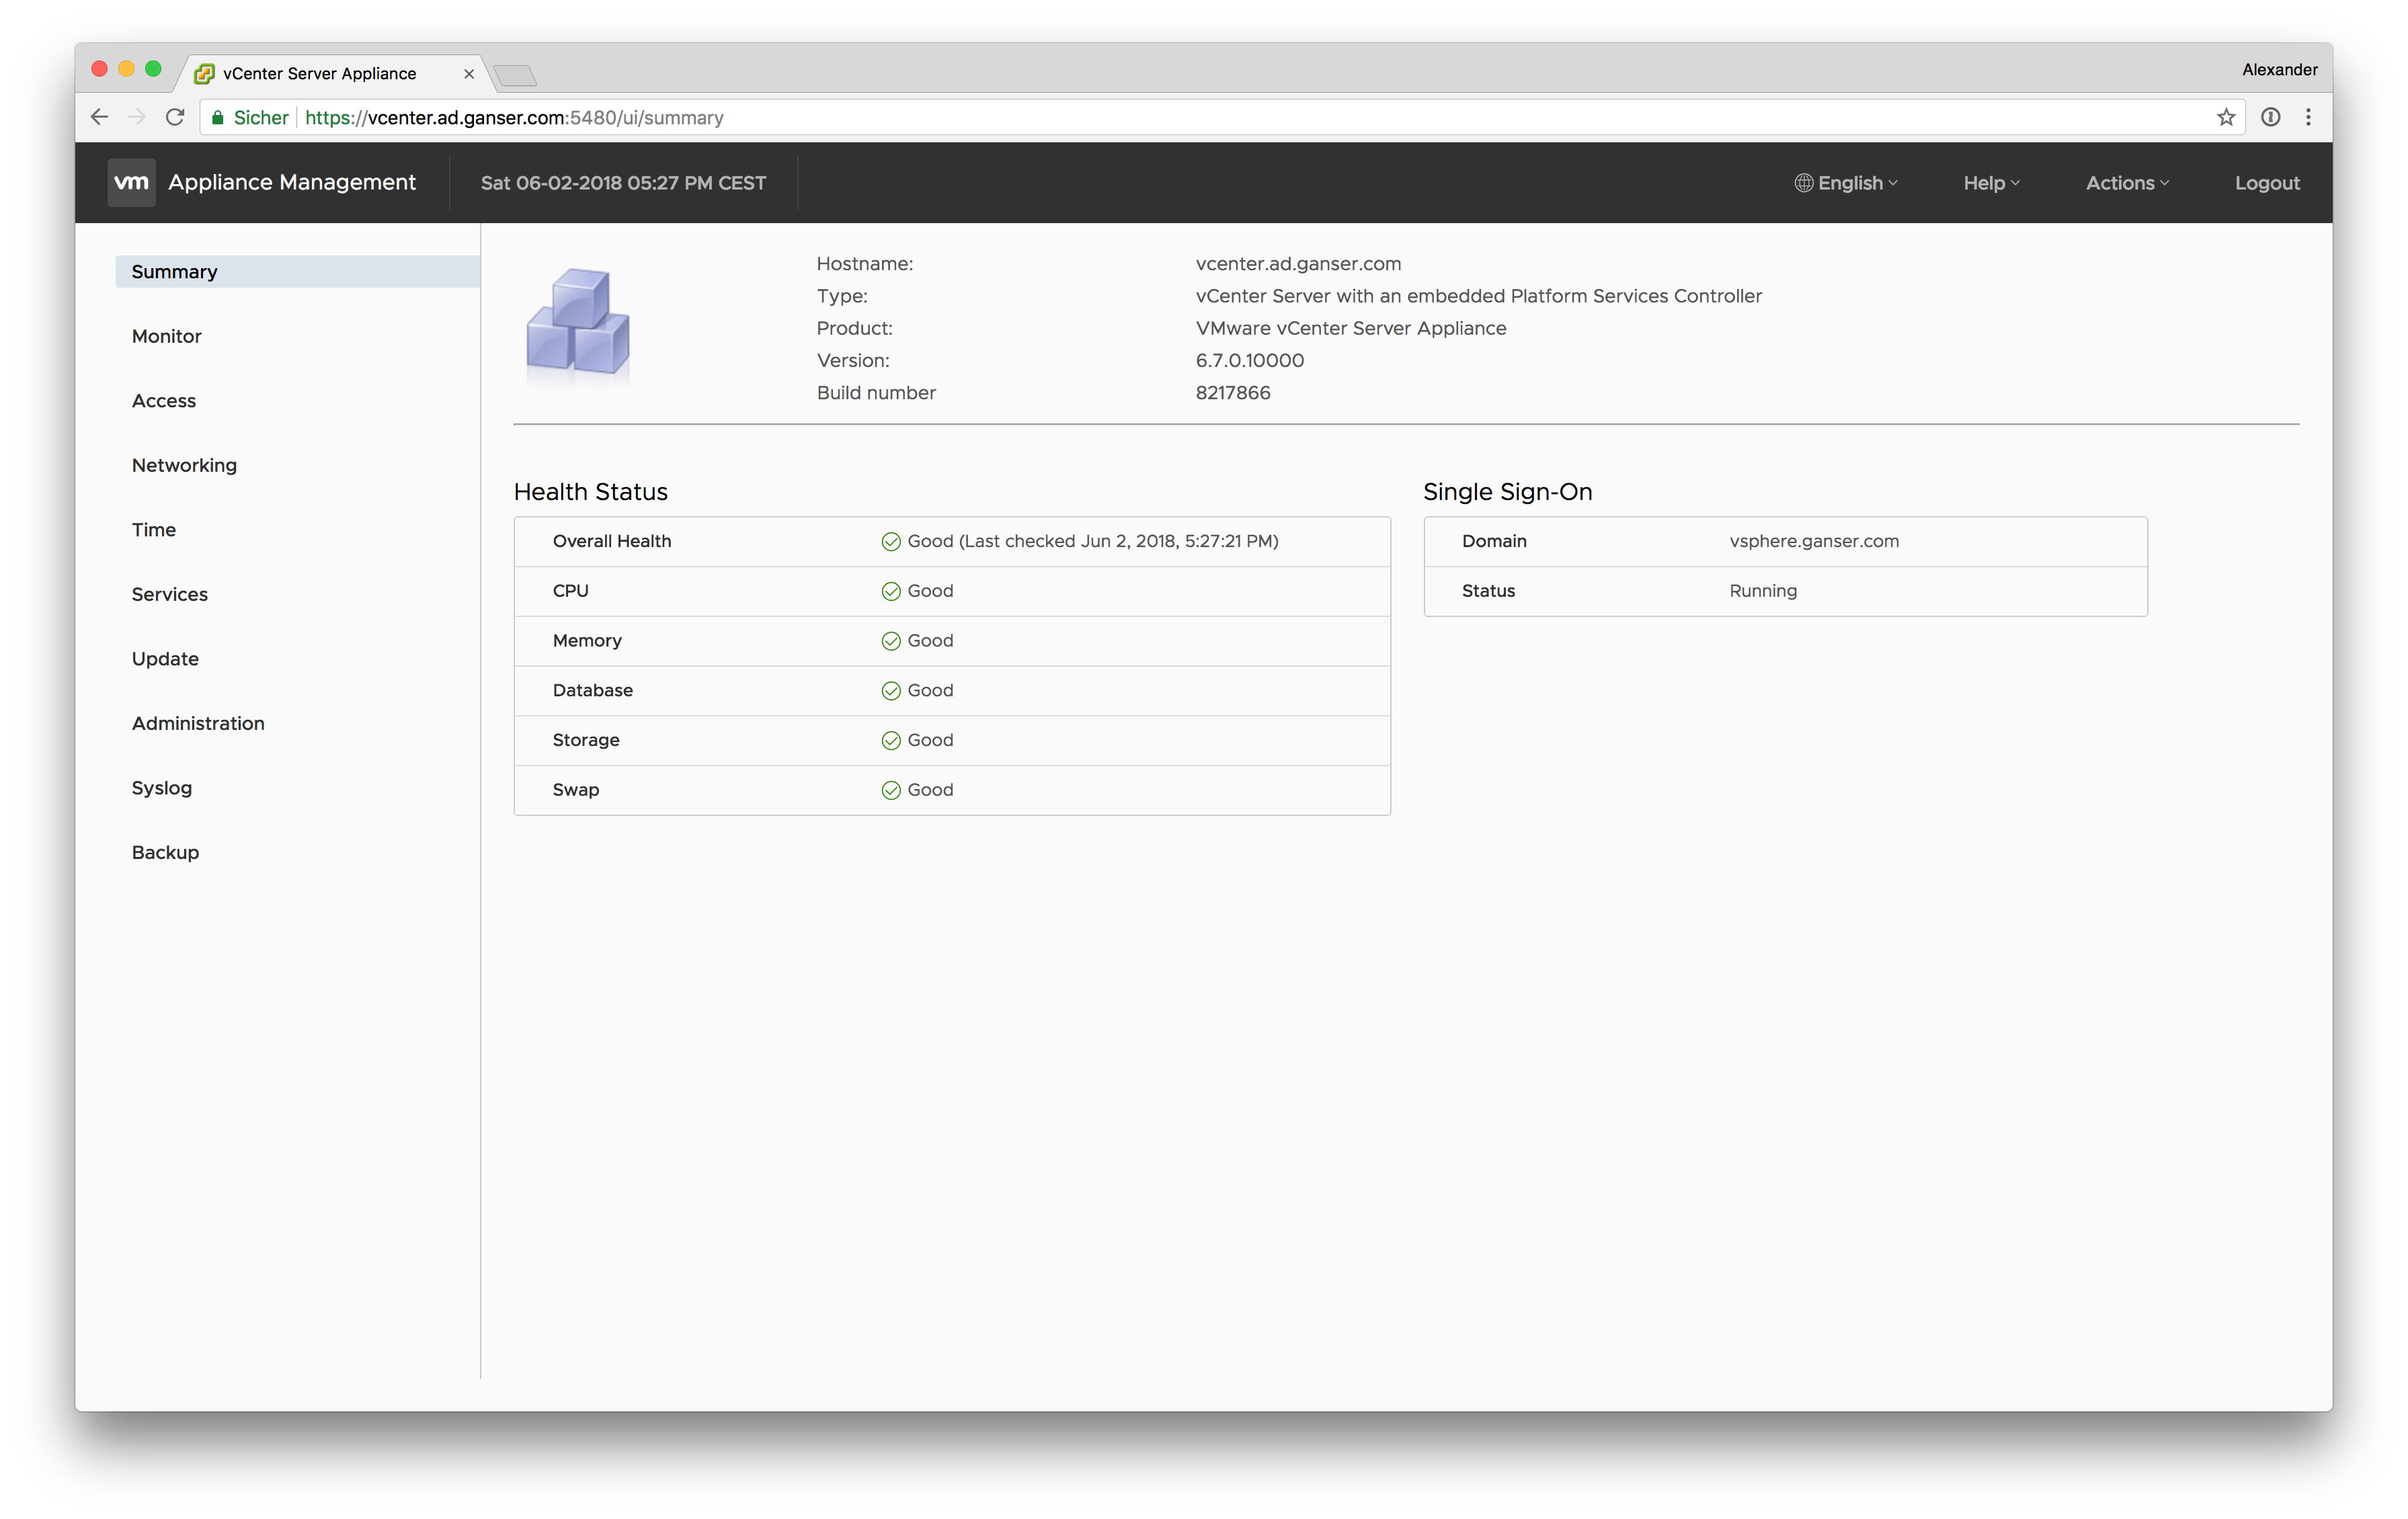
- Login to the appliance management (VAMI) https://your.vcenter.appliance:5480
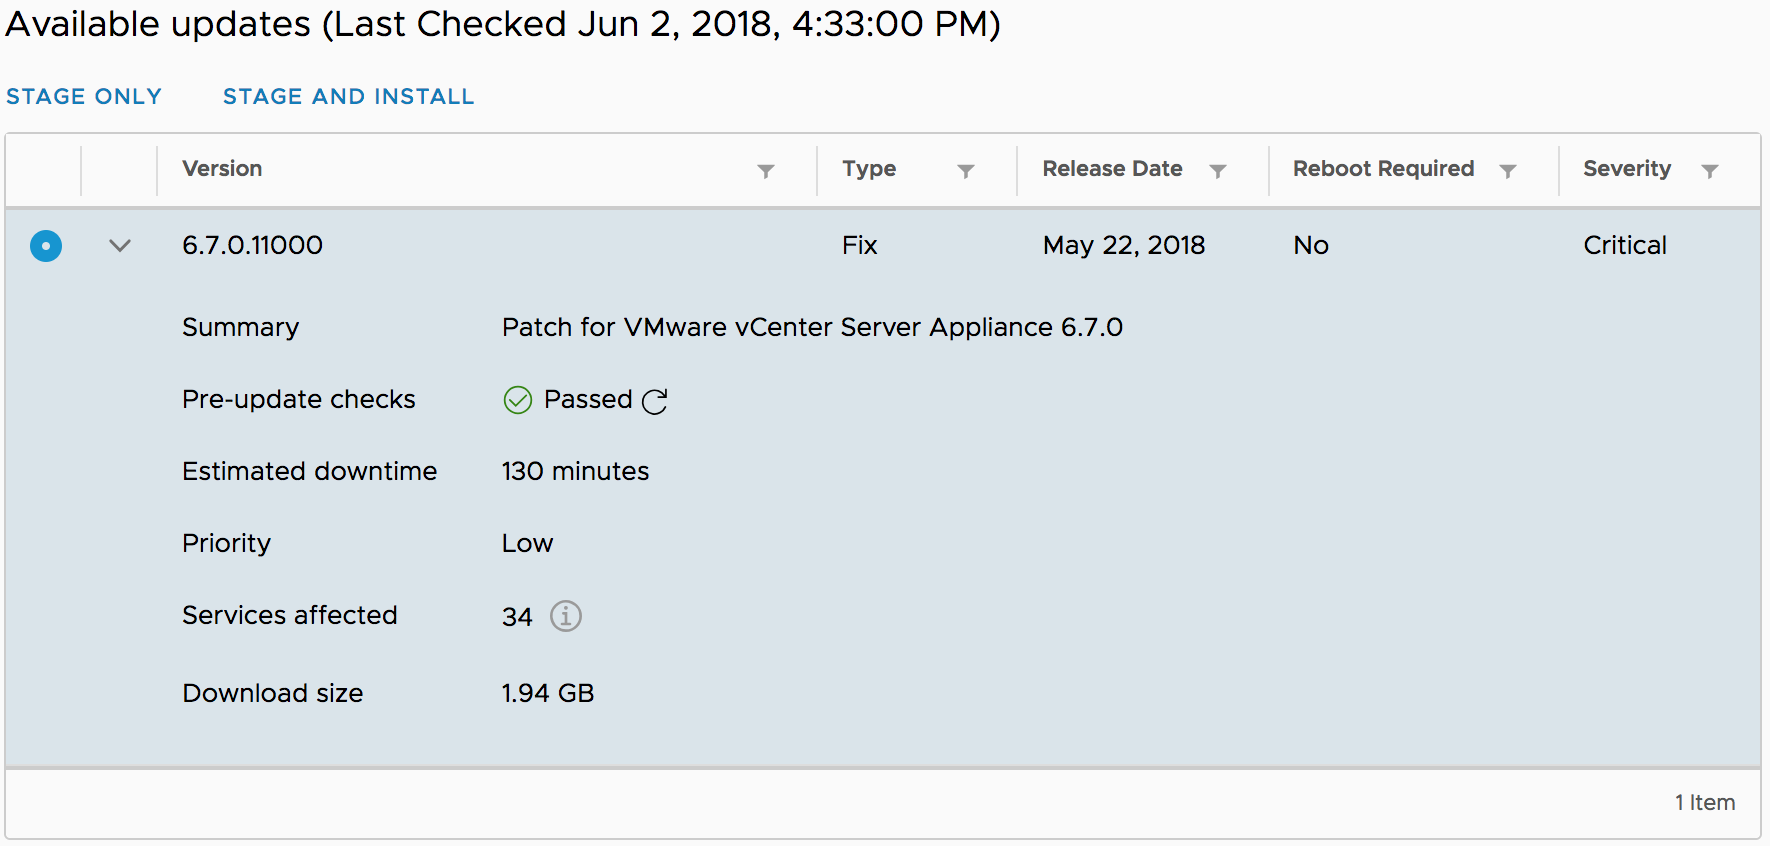
- Go to Update and click on Check Updates and then Check Repository (or CDROM for those who install from ISO)
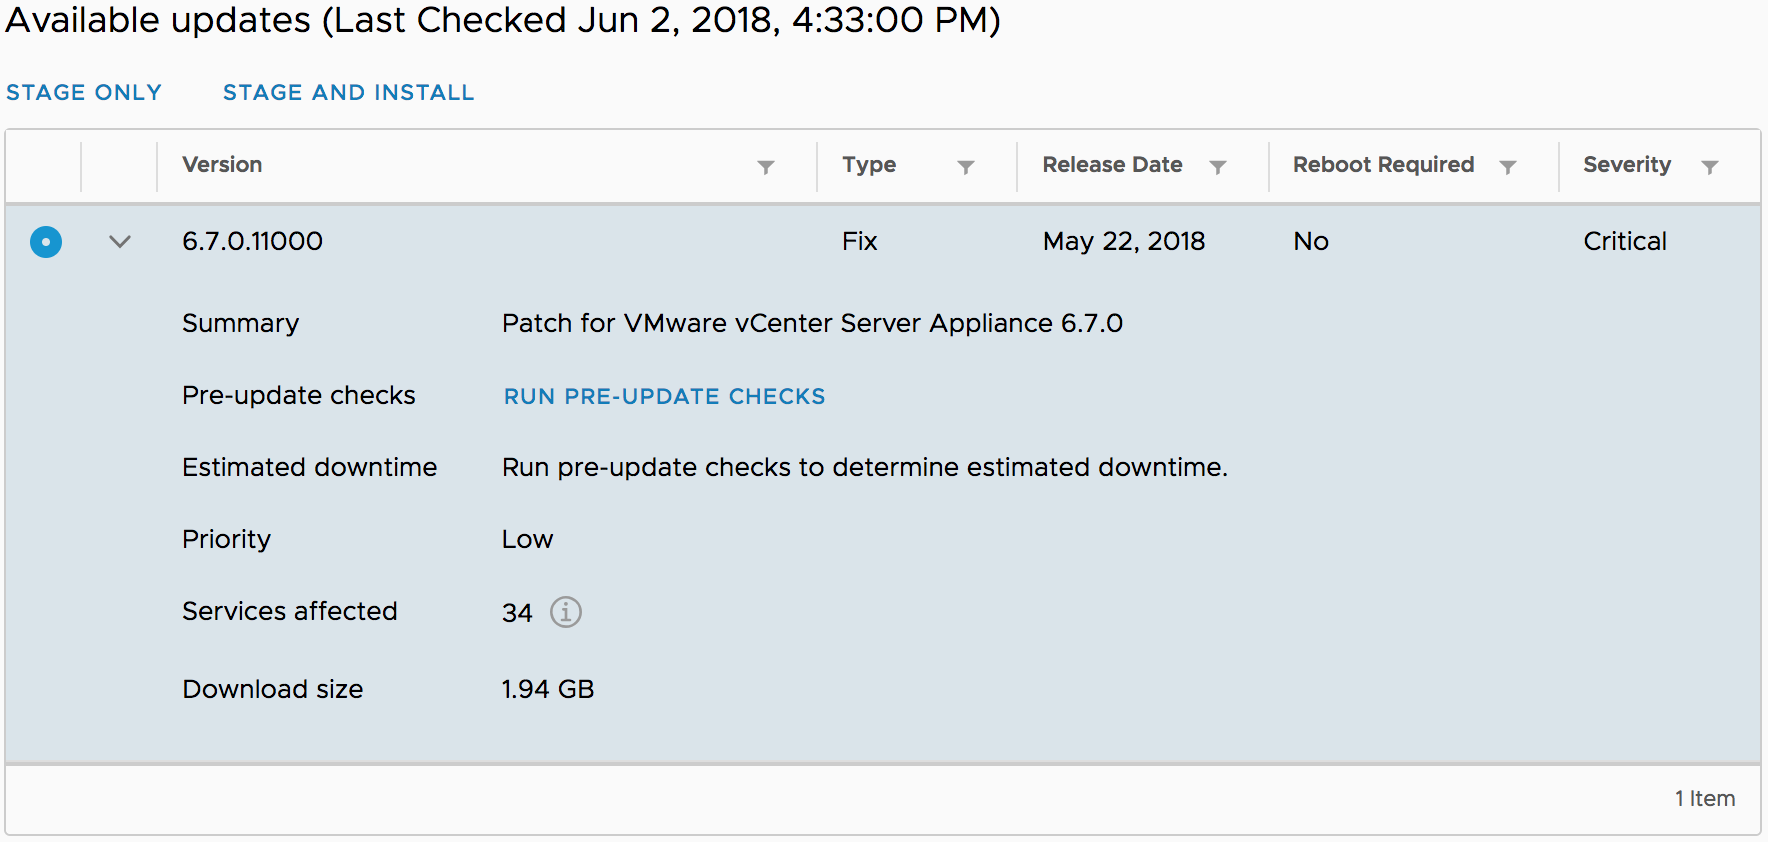
- With the “RUN PRE-UPDATE CHECKS” you can test your VCSA and gets the estimated downtime. For two installations in LAB the time never was so long. The update gets installed much quicker. Click on Stage and Install to install the update
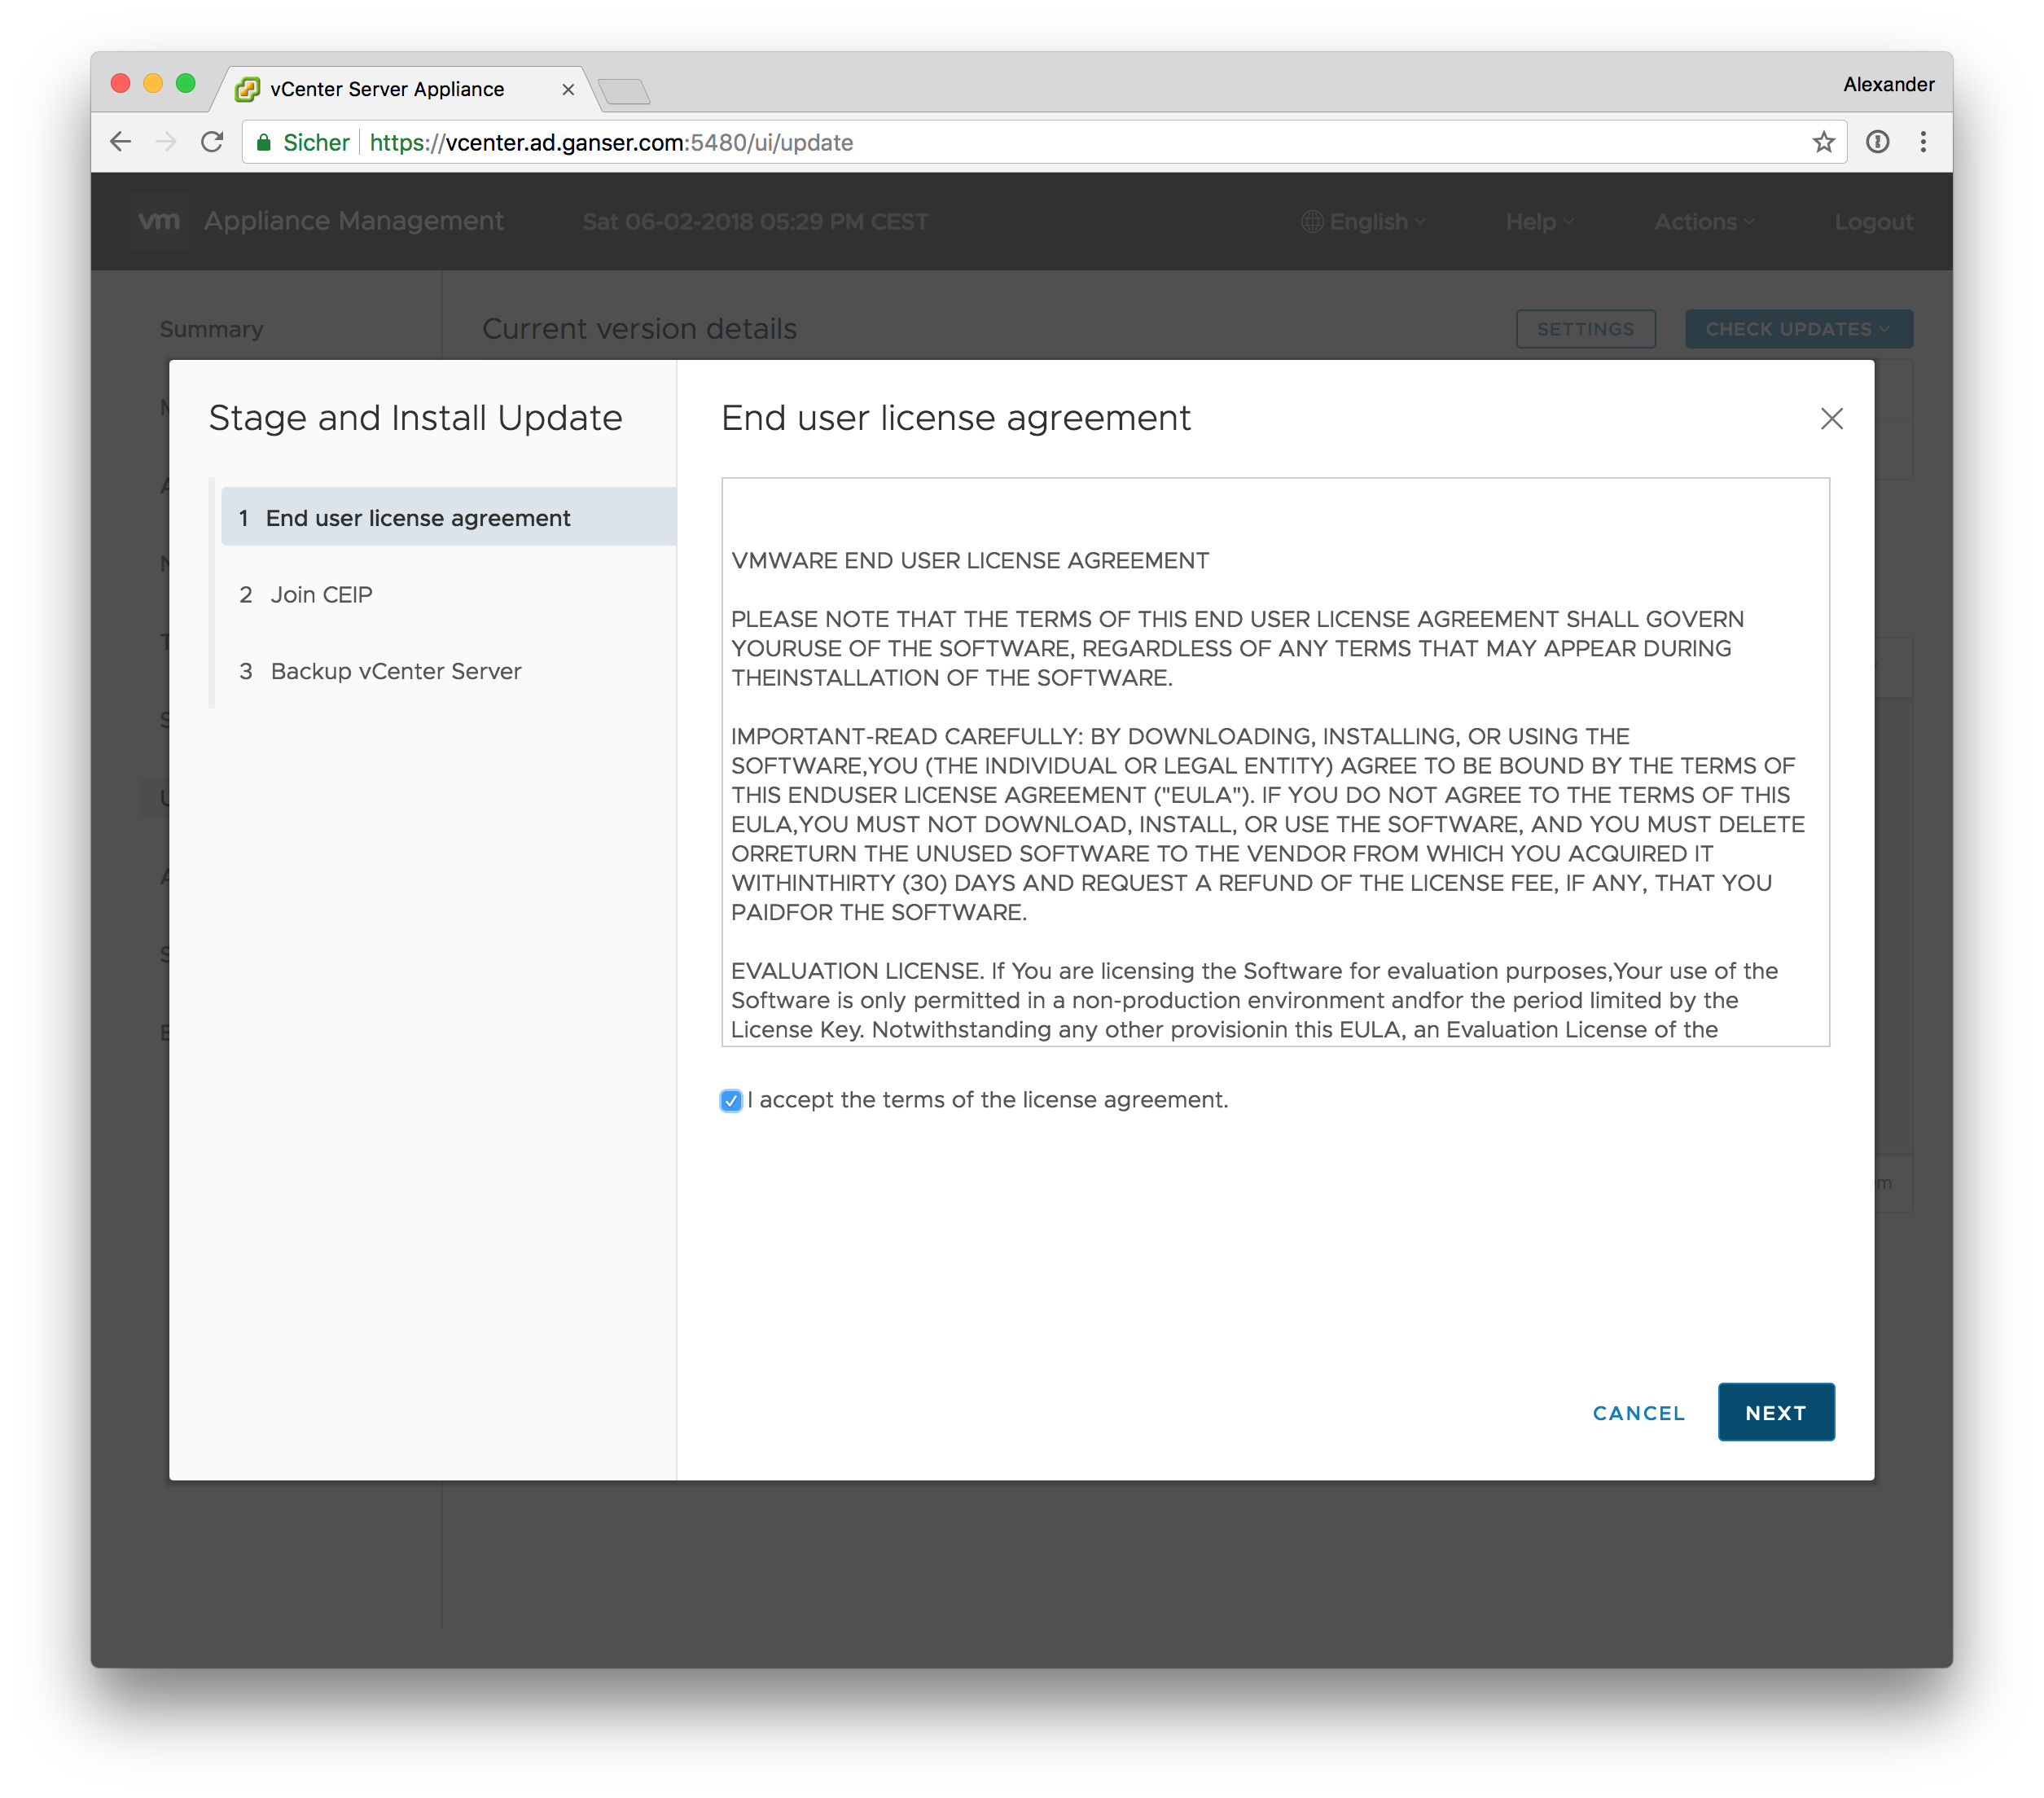
- Accept the License Agreement and click Next
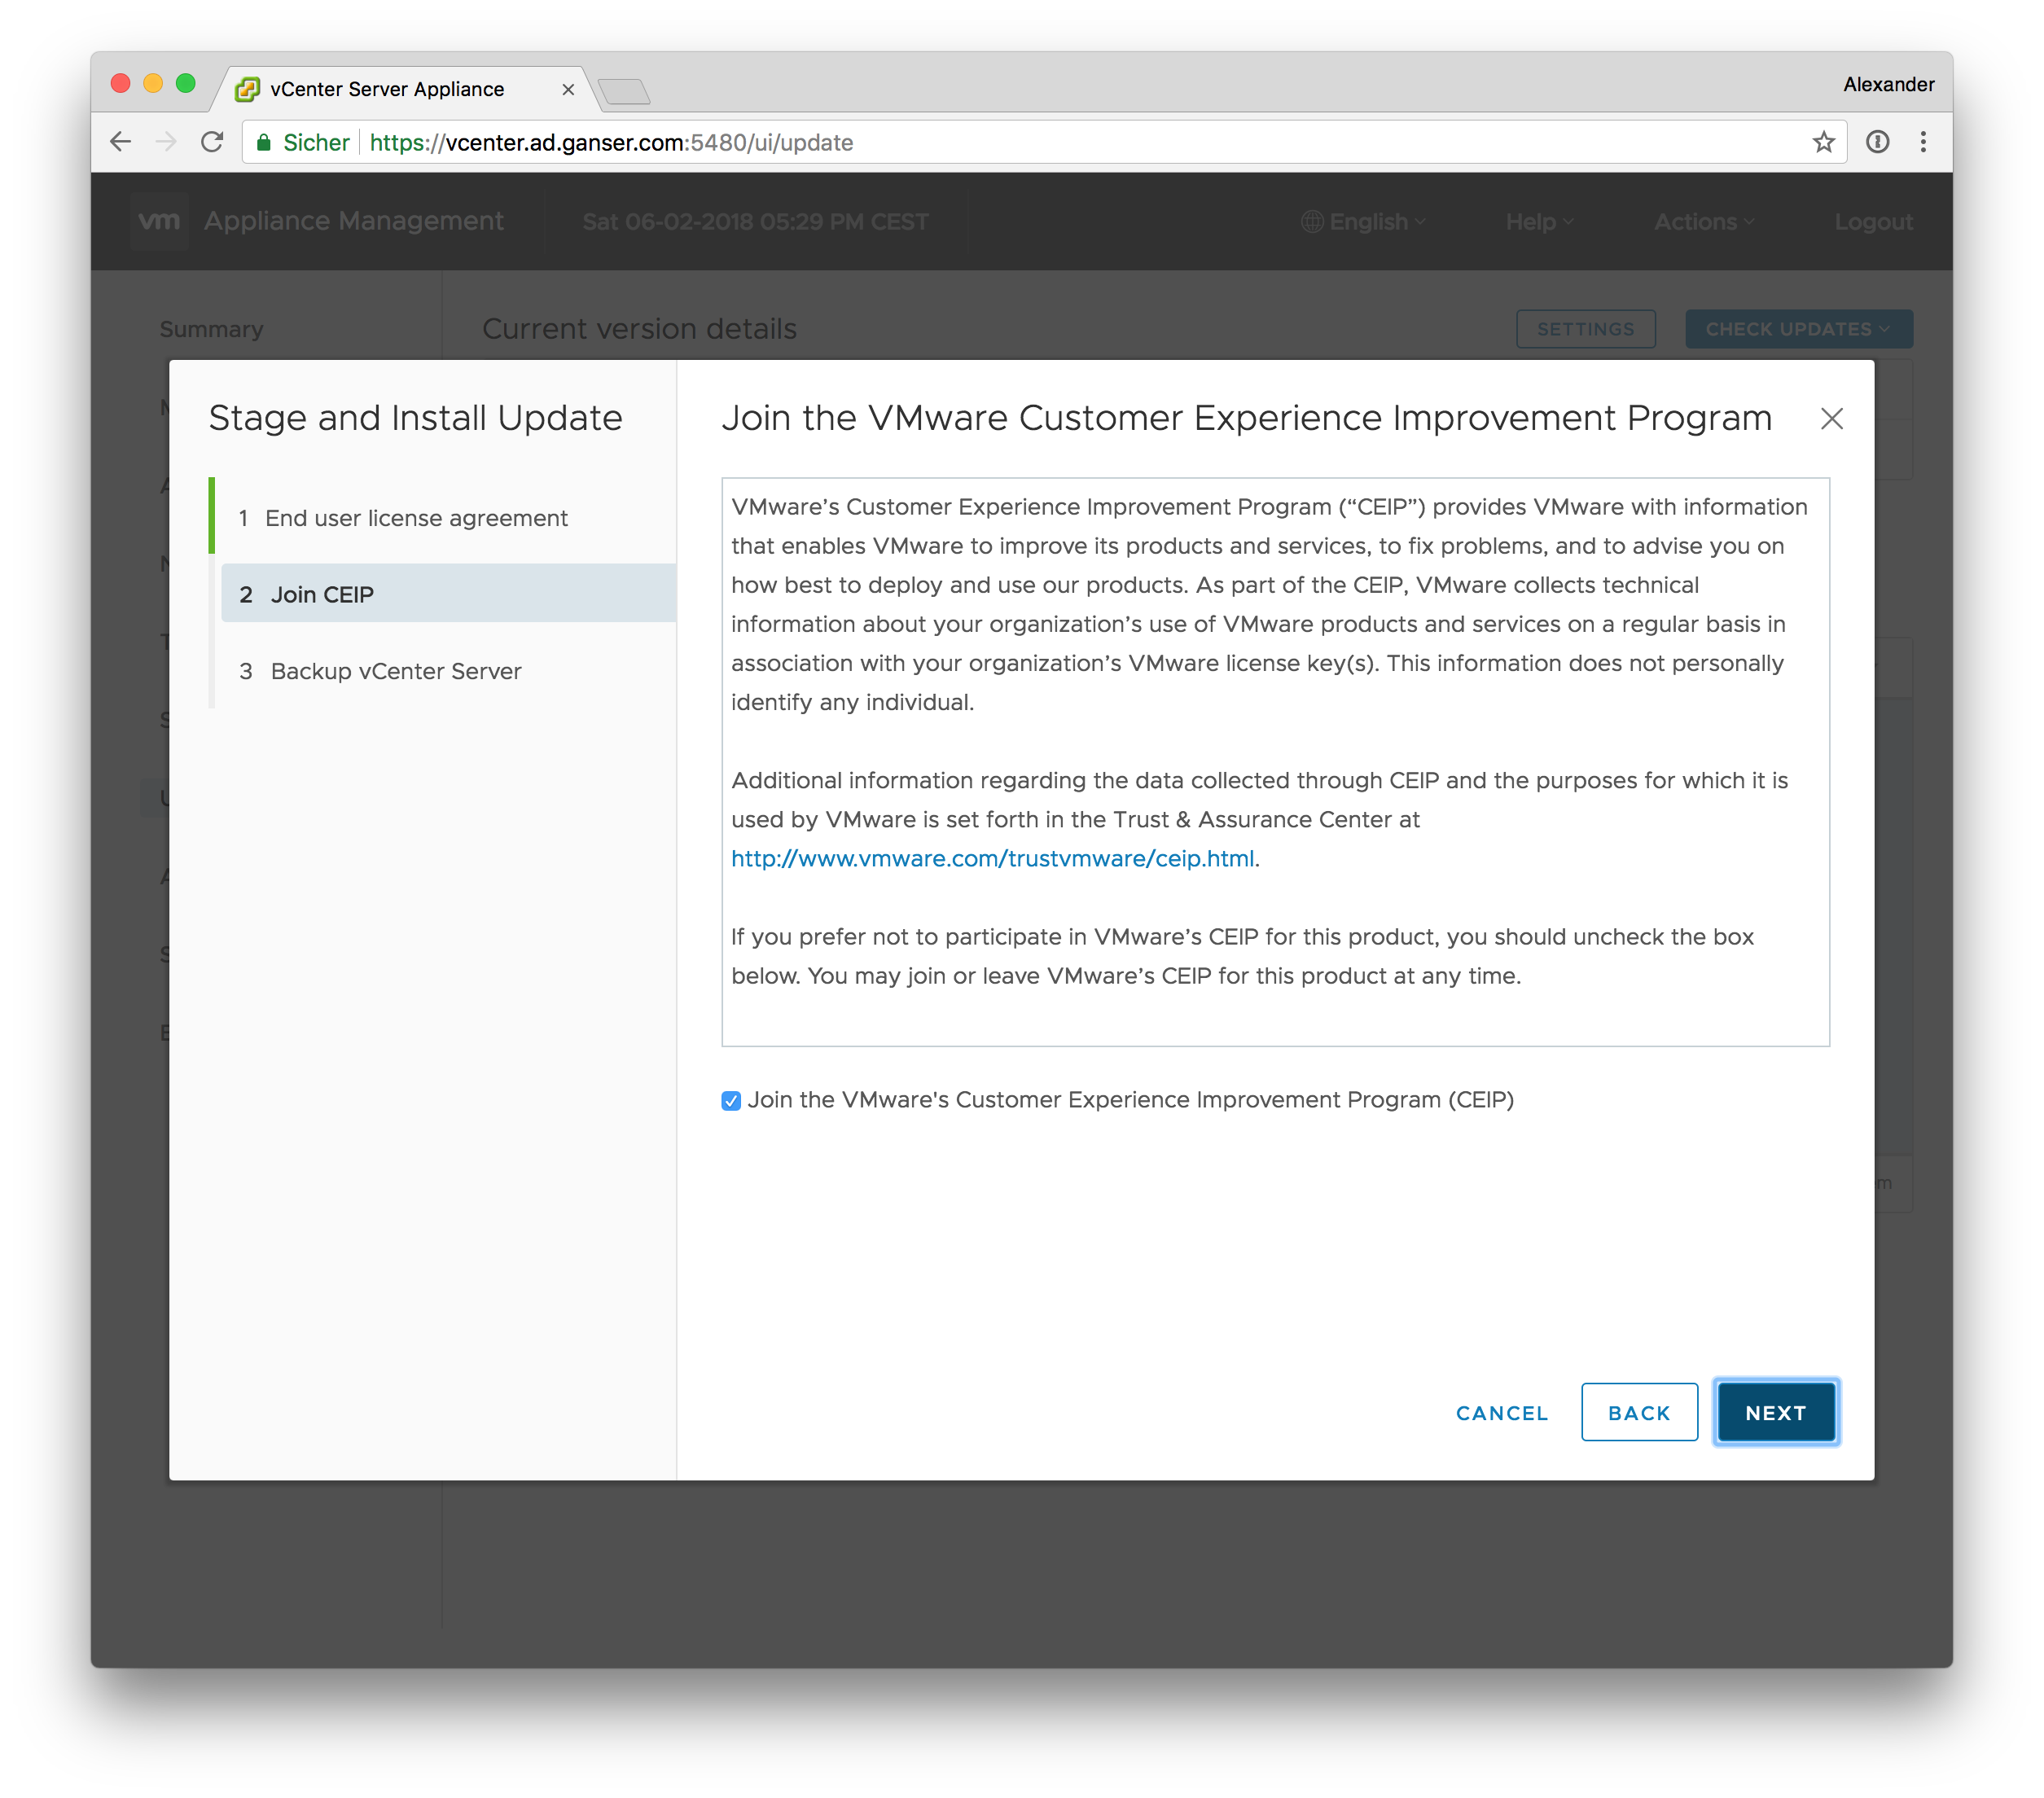
- [optional] Join or leave the CEIP (Customer Experience Improvement Program) and click on Install
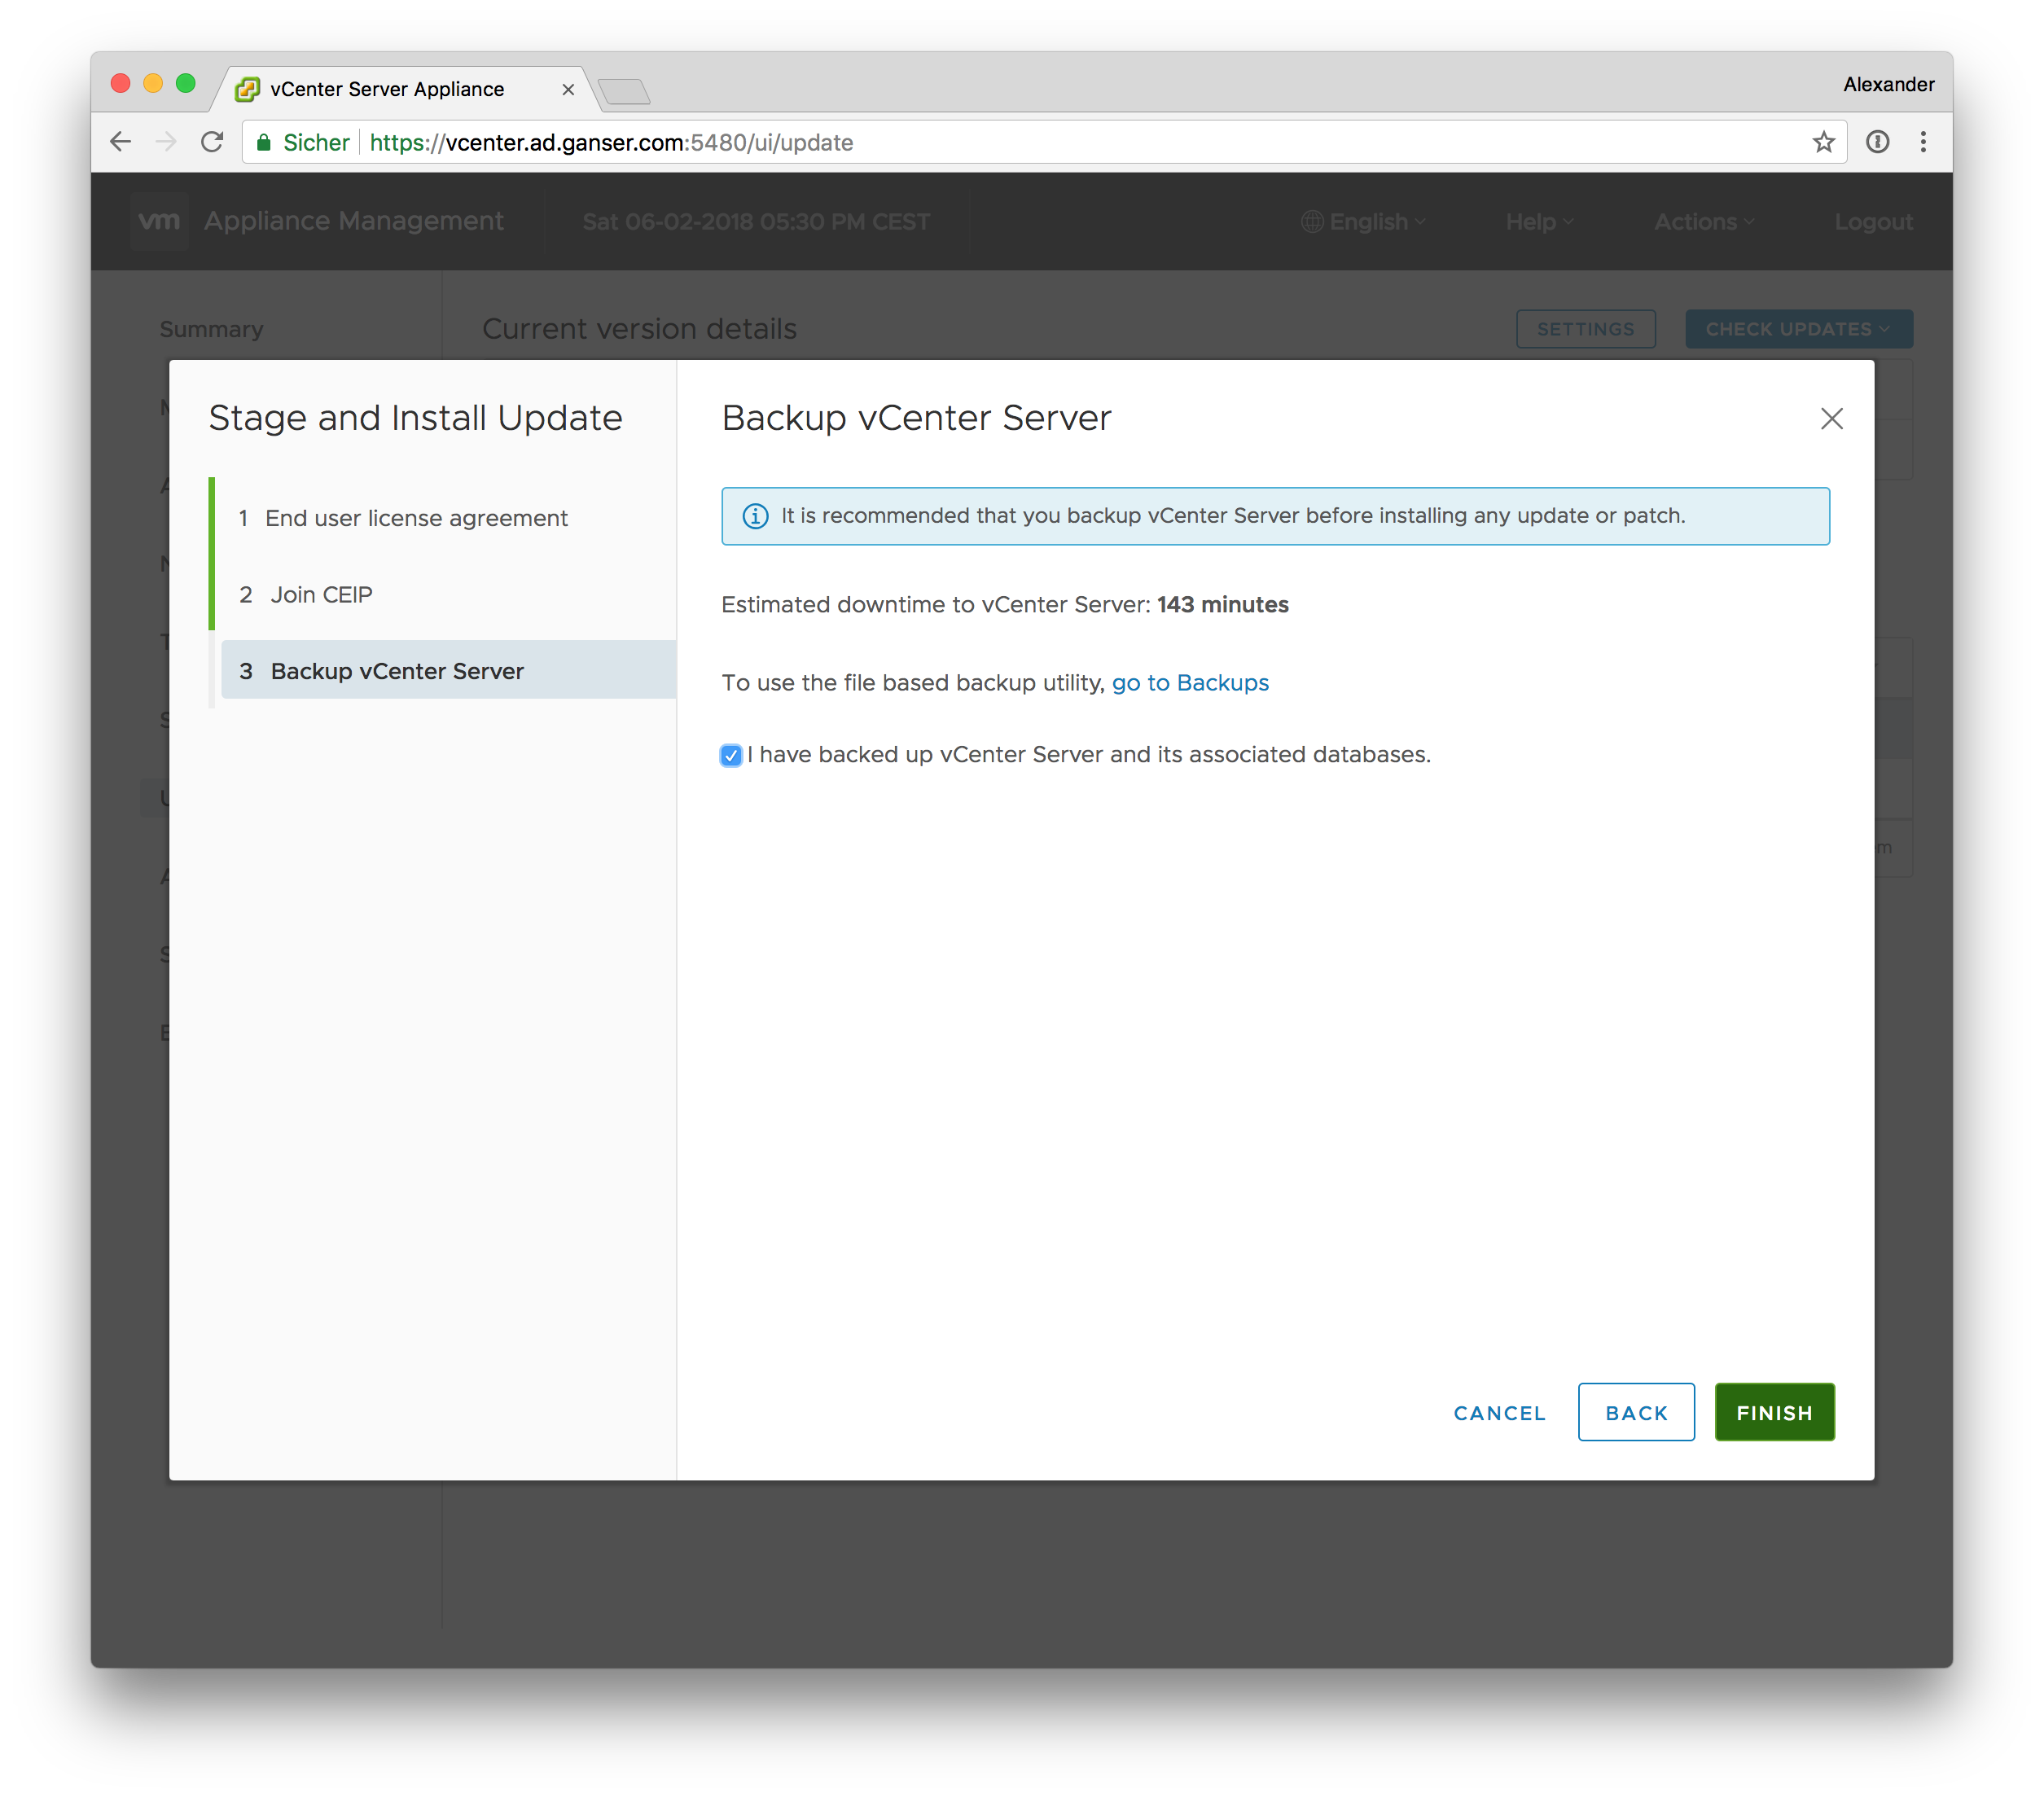
- You should always make backups ;)
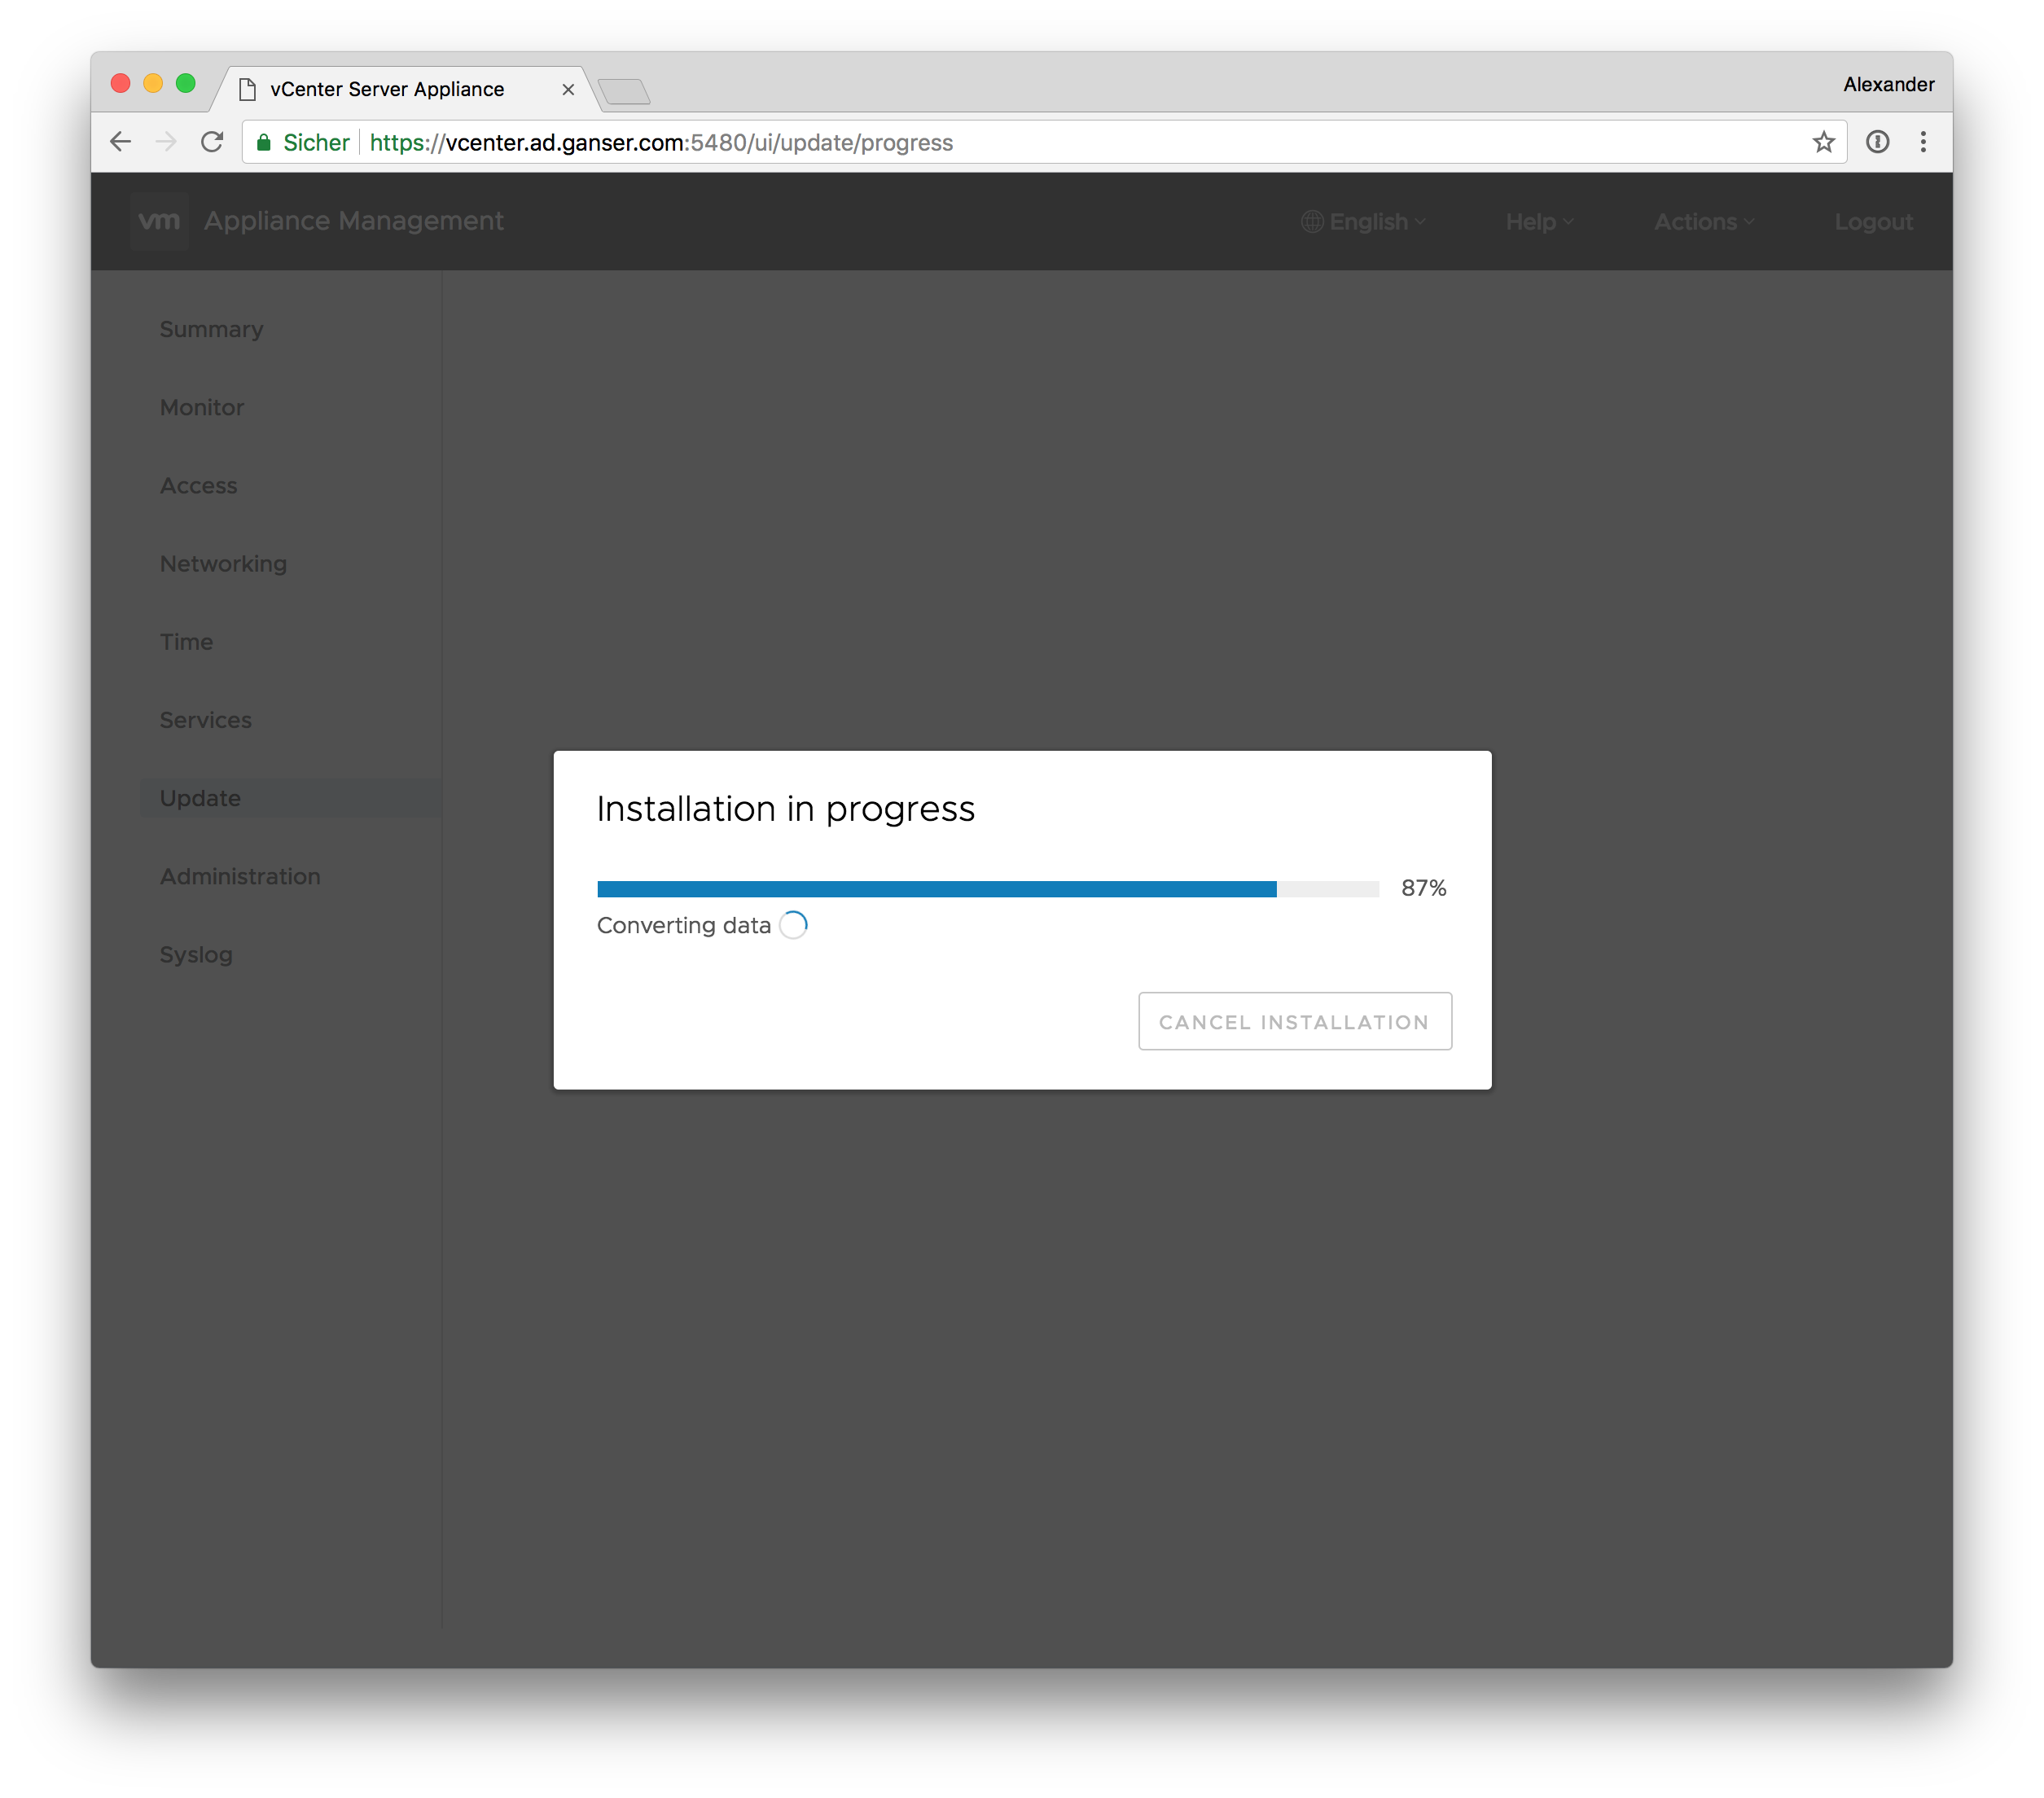
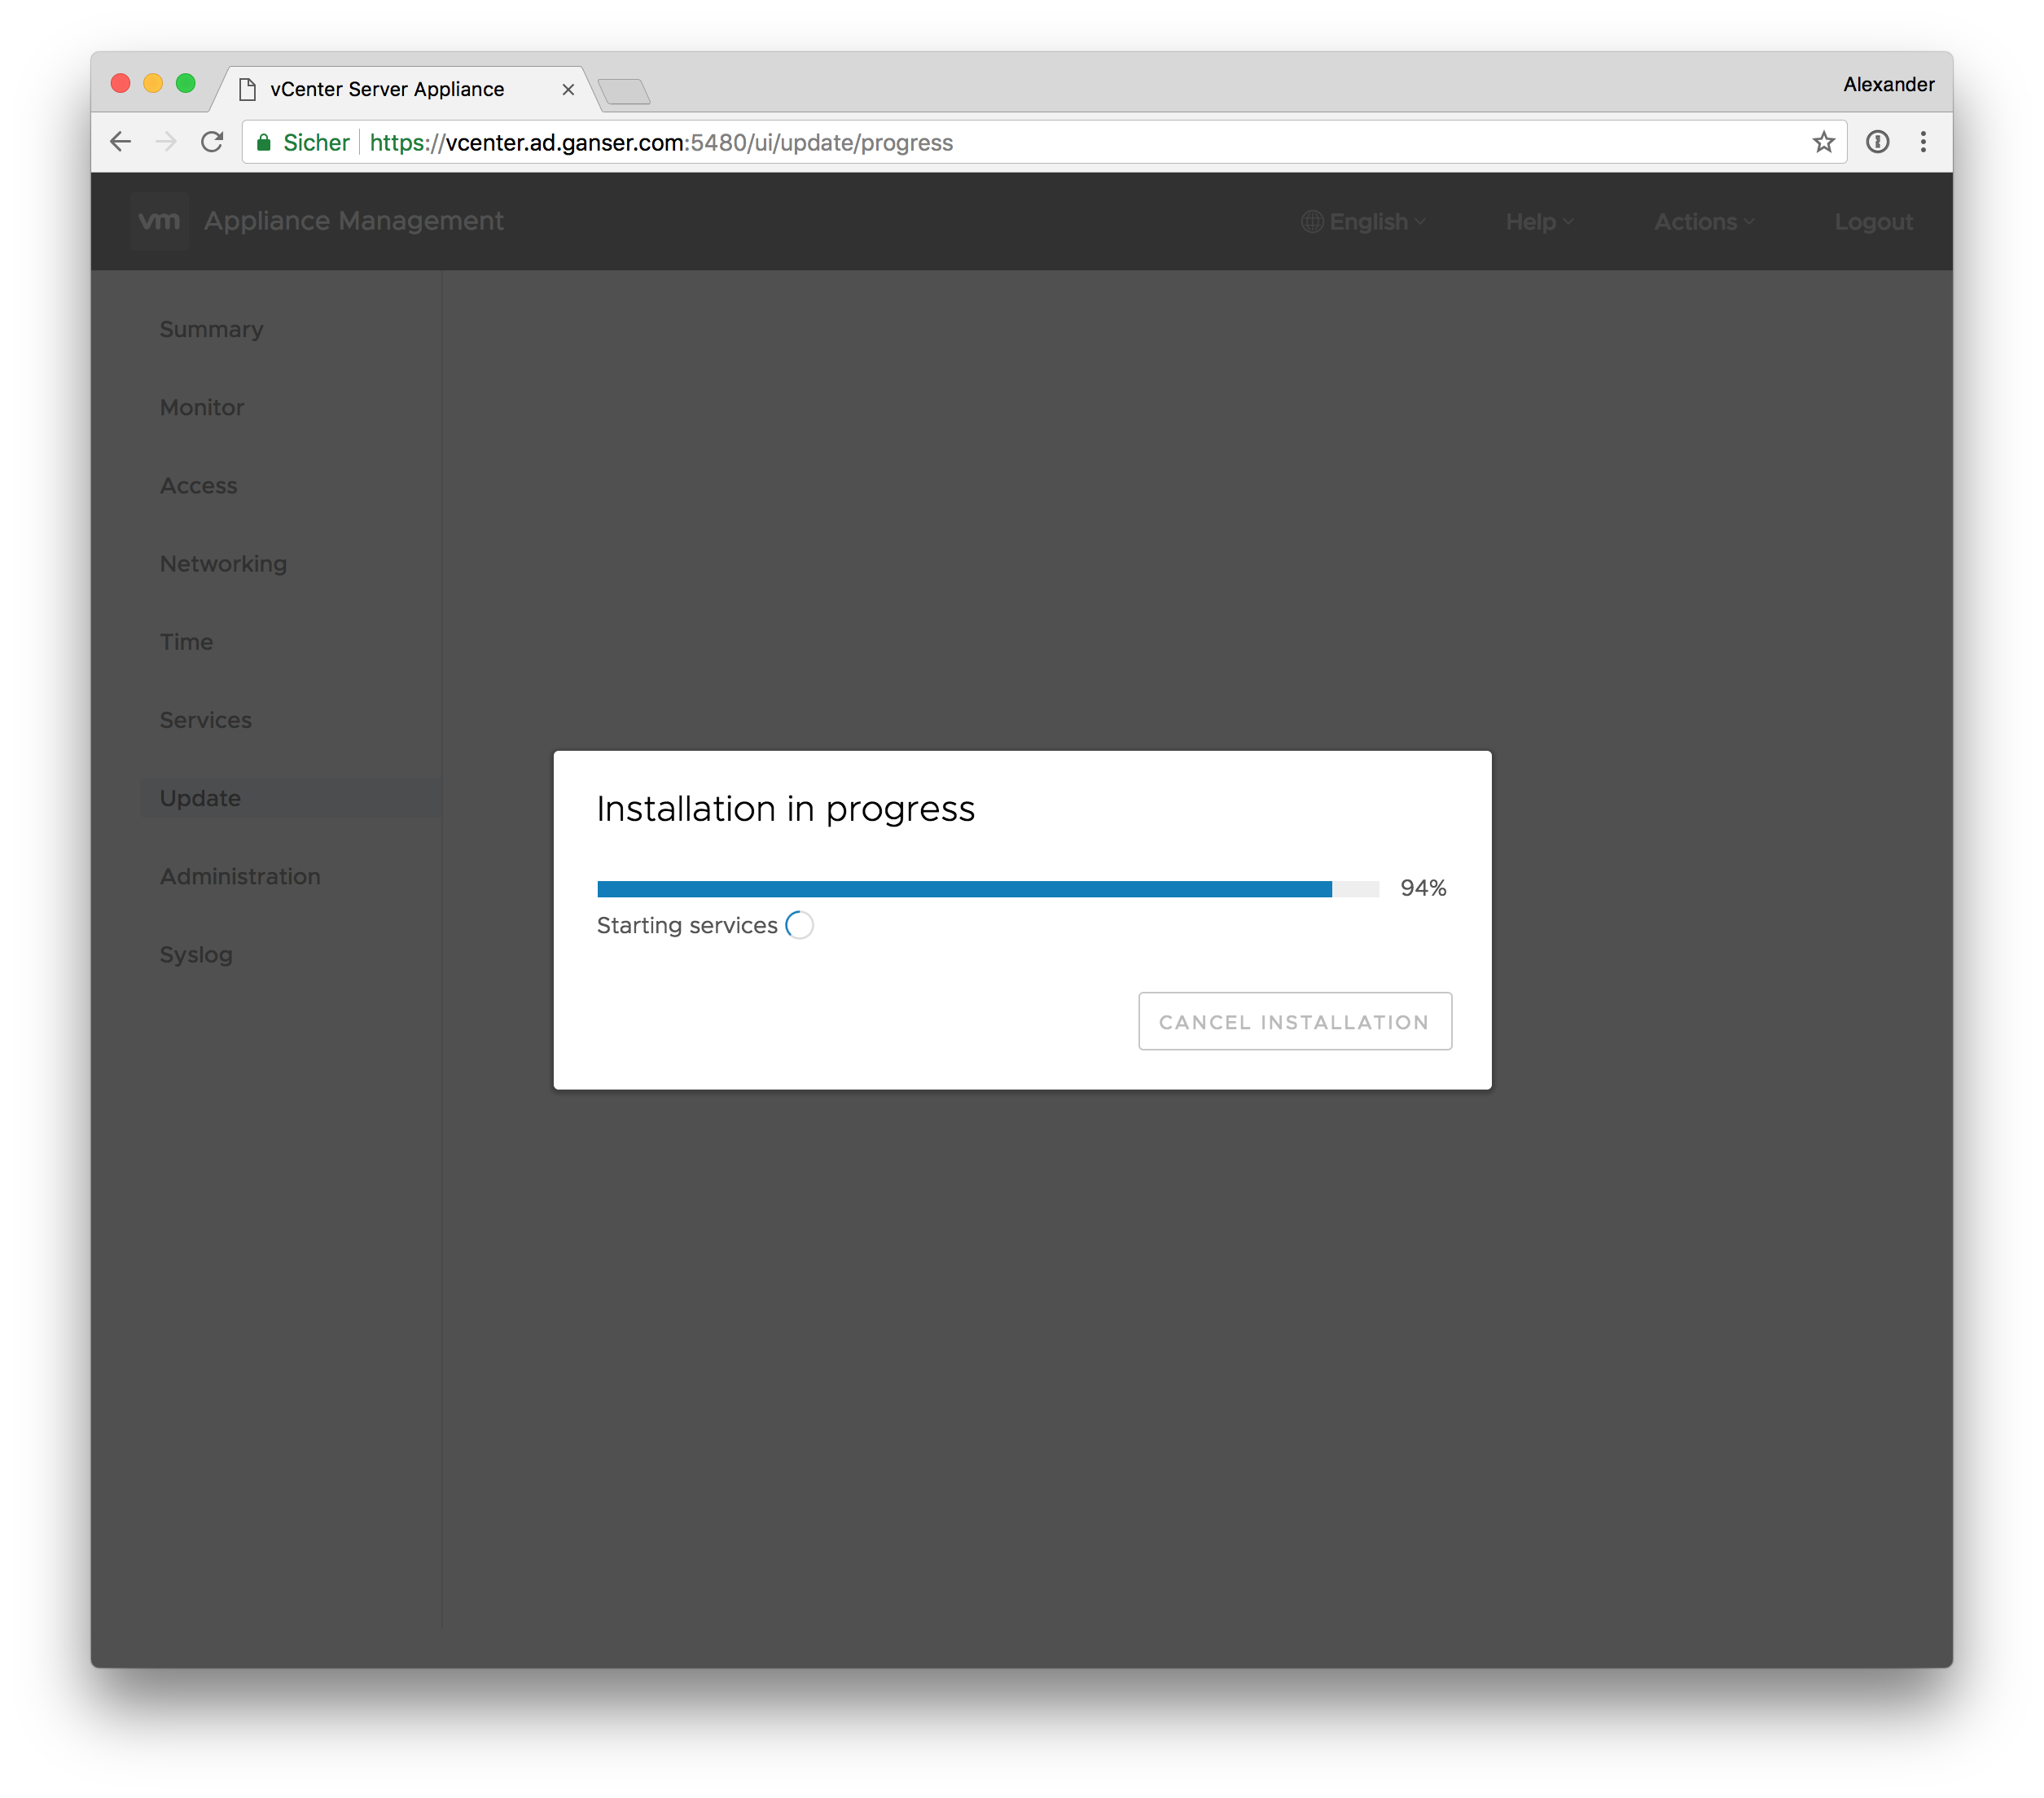
- After that the update will run several minutes.


- The reboot step is not necessary anymore. After starting the services the update is done.

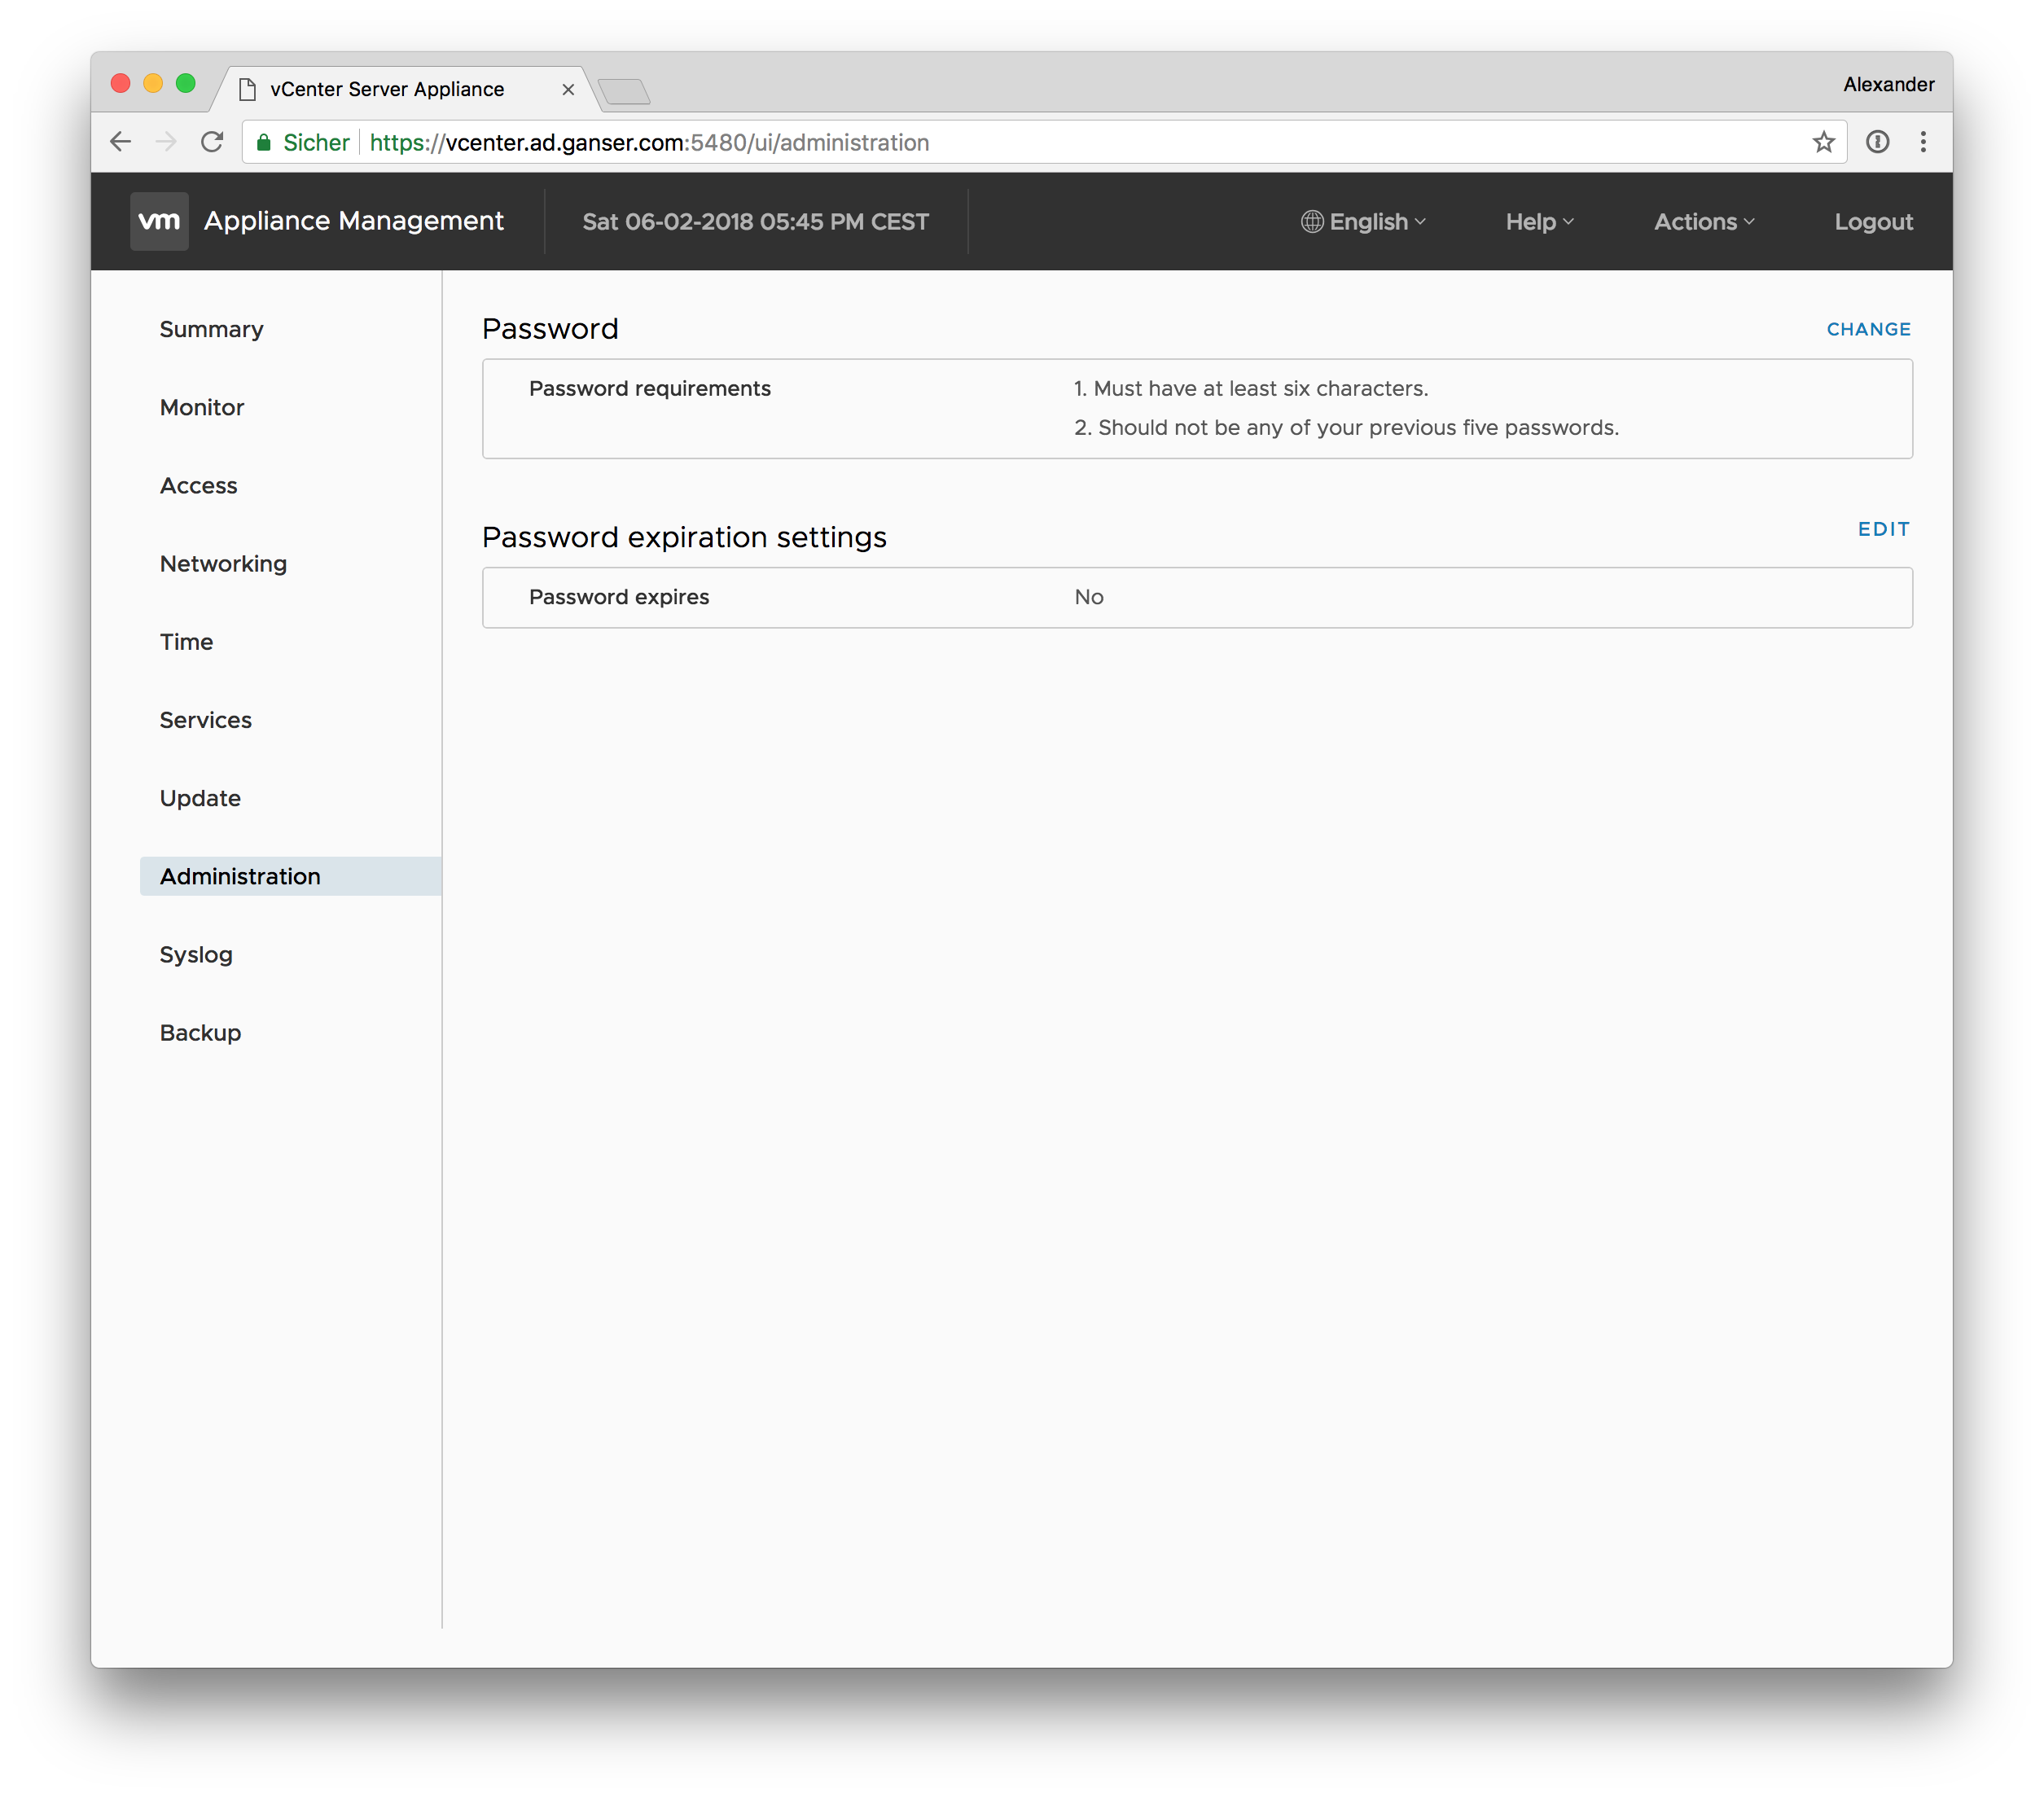
My last step after every update is to look into Administration > Password expires.
Since VCSA 6.5 u1d the root password expiration setting didn’t change its value but I rather take a look after the update.
Leave a Reply