The NSX Manager is the central component of NSX. It is a single VM which is deployed as appliance. How to do the few steps to deploy the machine is explained here…
Preparation
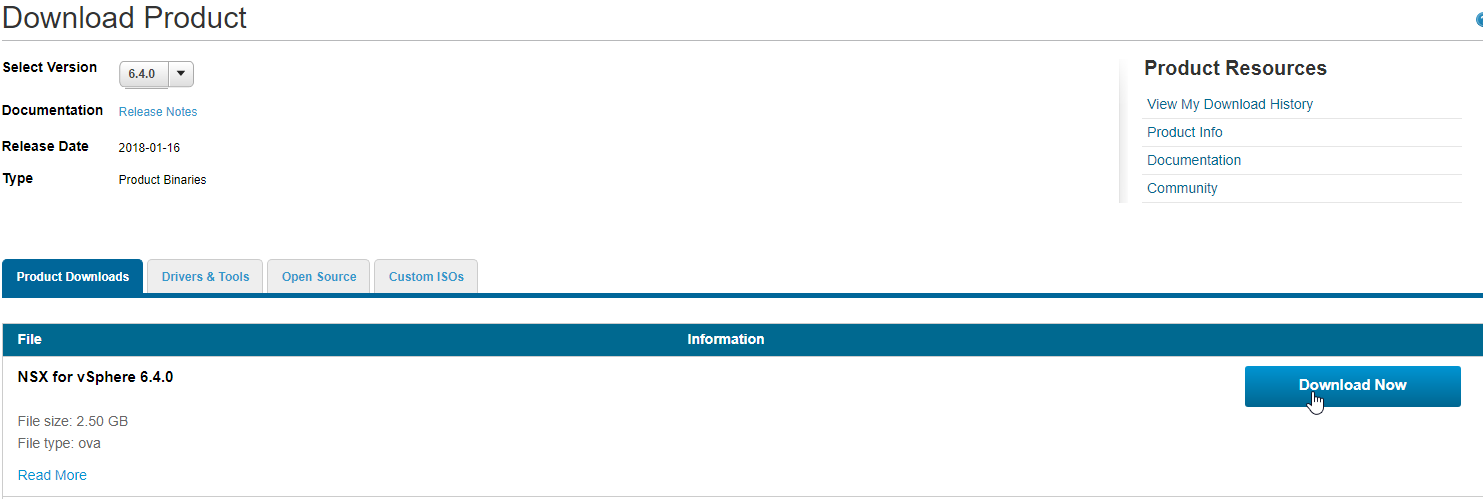
- Download the OVF template from my.vmware.com
Appliance deployment
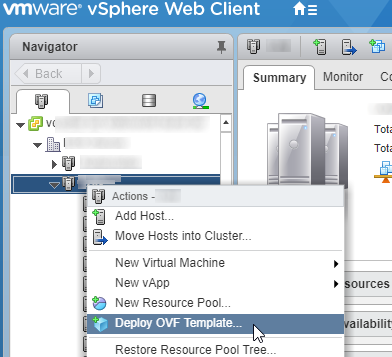
- Login to vCenter WebClient
- Right-Click in your Cluster and select Deploy OVF Template
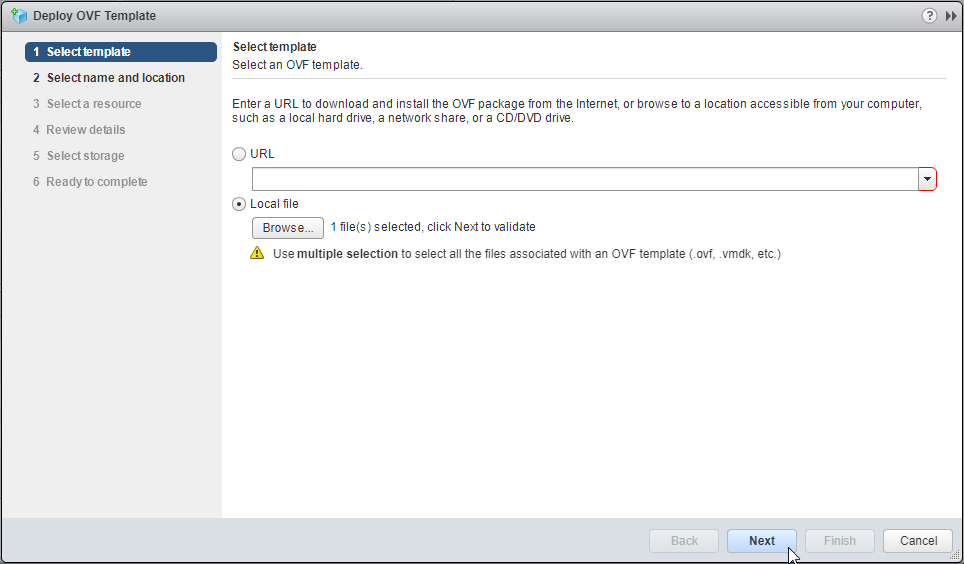
Deploy Wizard
- Select LocalFile and browse to the downloaded ovf.
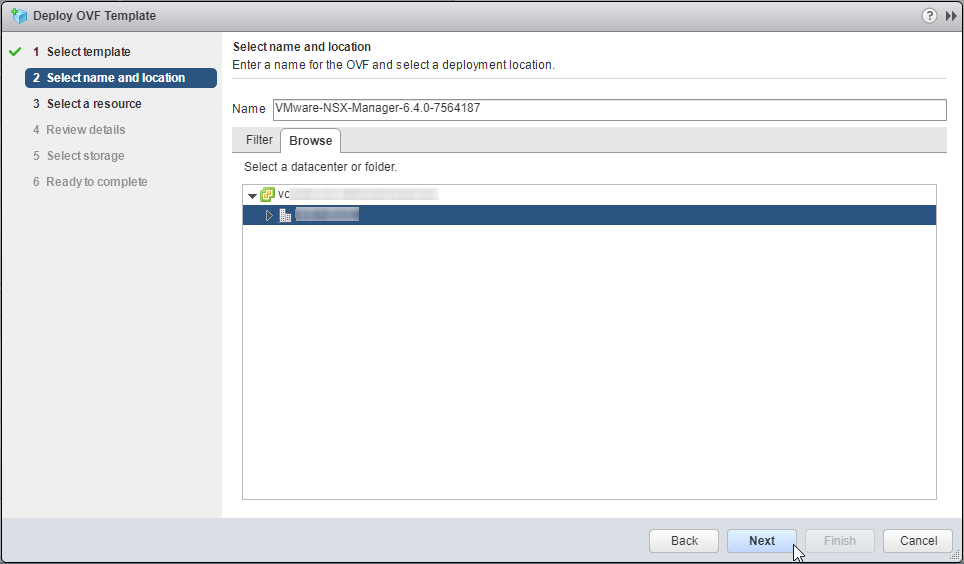
- Change the name for the appliance as desired and select a datacenter or folder to deploy to.
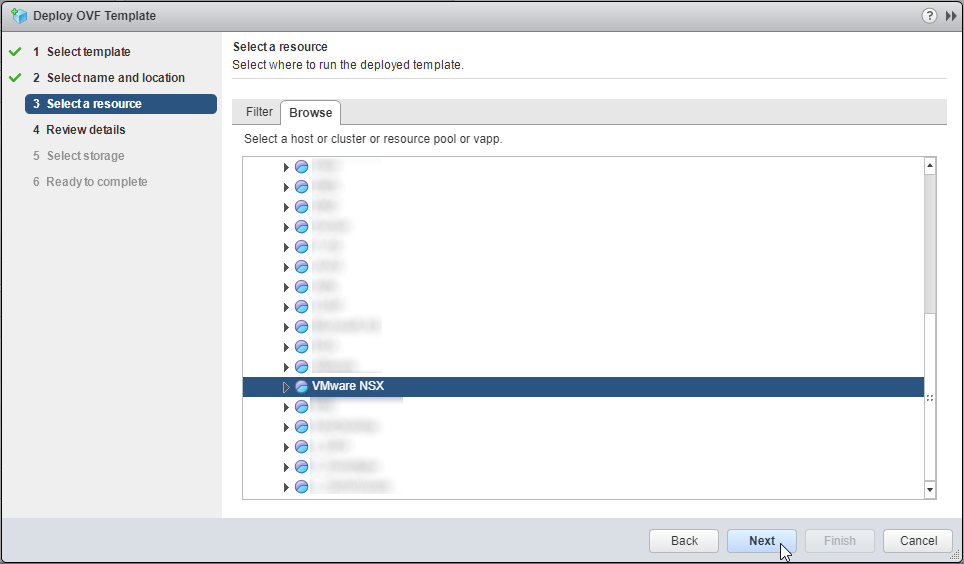
- After Cluster is selected you have to select a resource pool
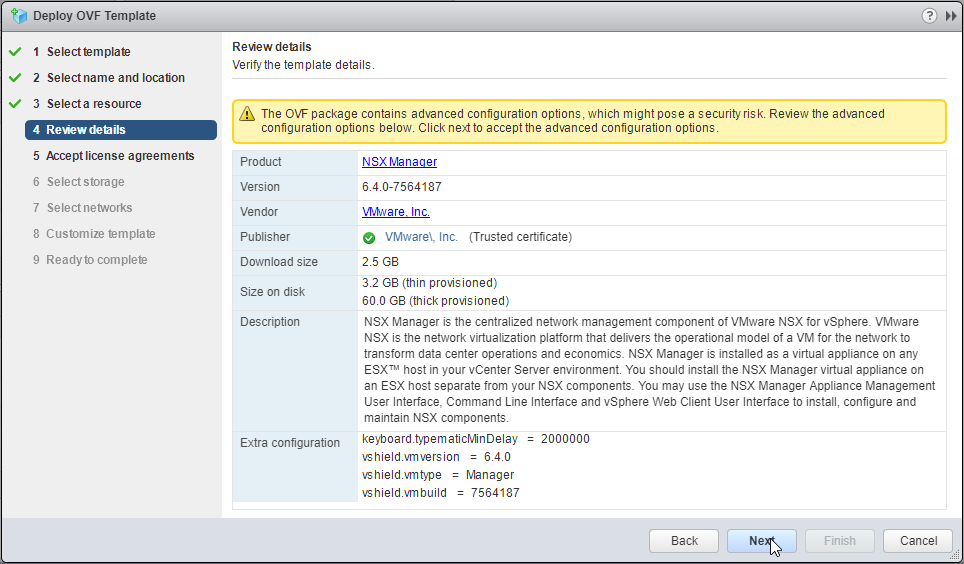
- Click on Next to accept the advanced configuration options.
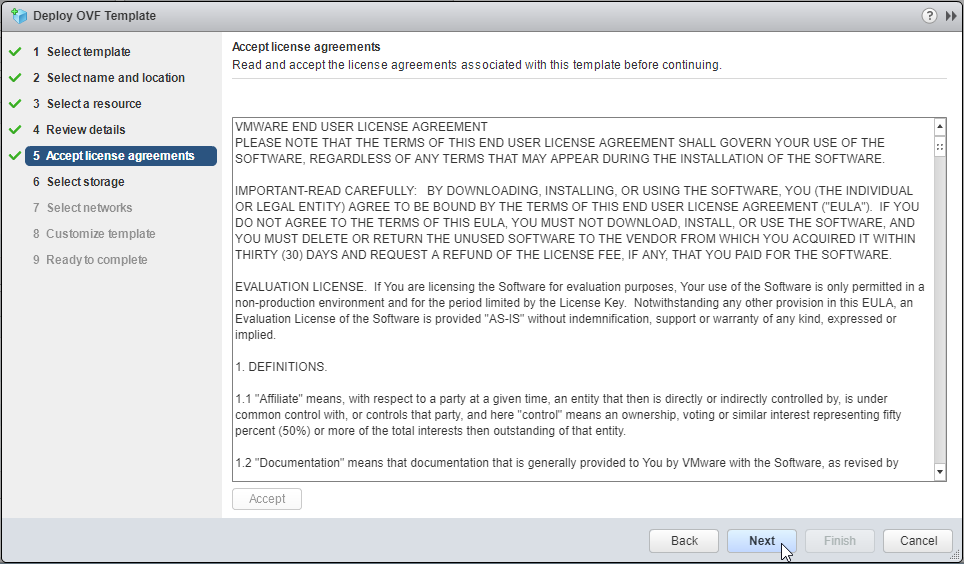
- You have to accept the license agreements.
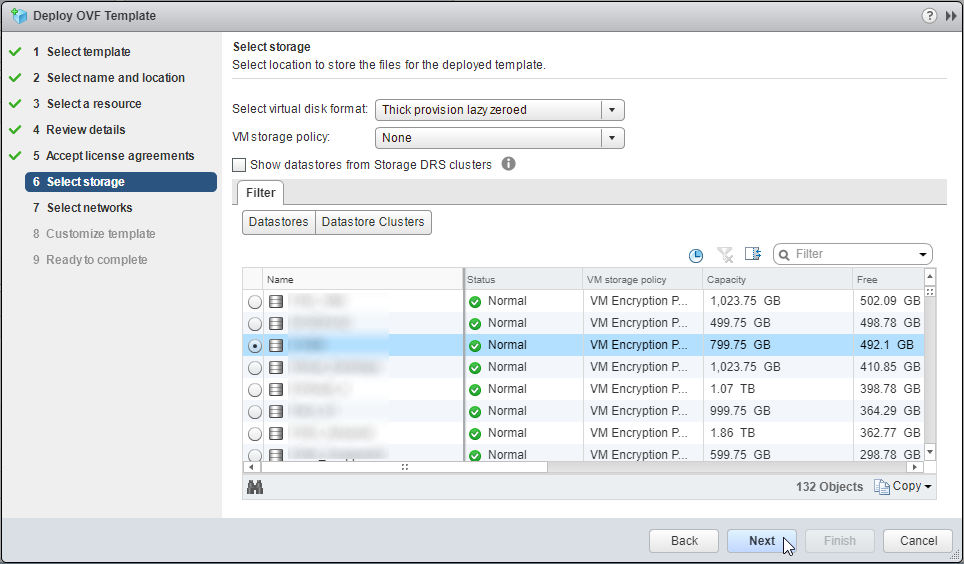
- Choose a storage for the appliance (a 60GB harddisk will be created)
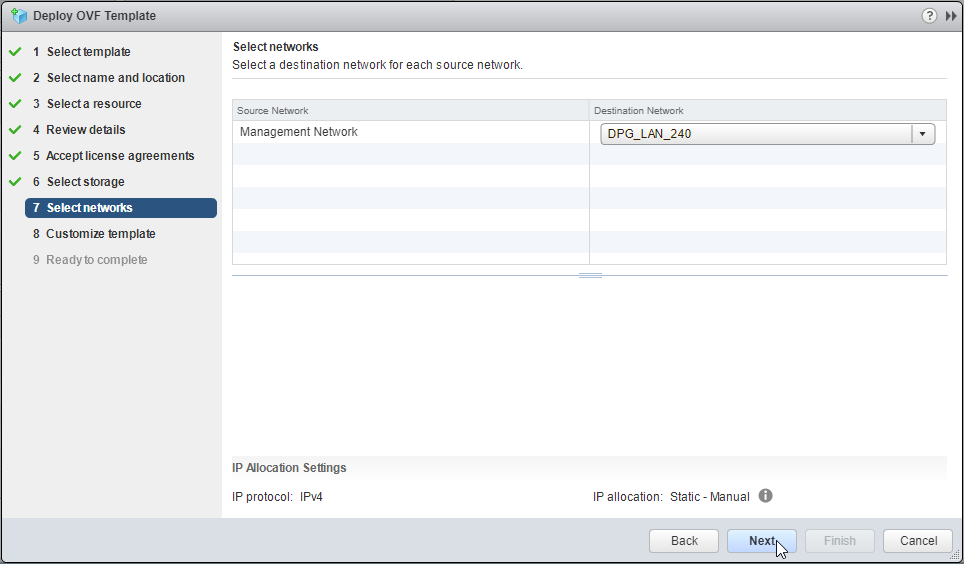
- Select the network
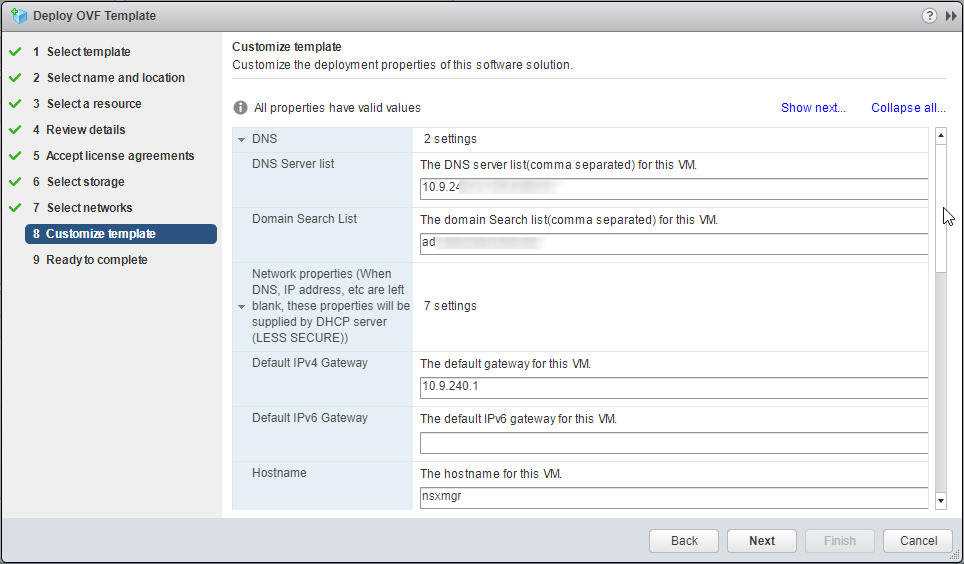
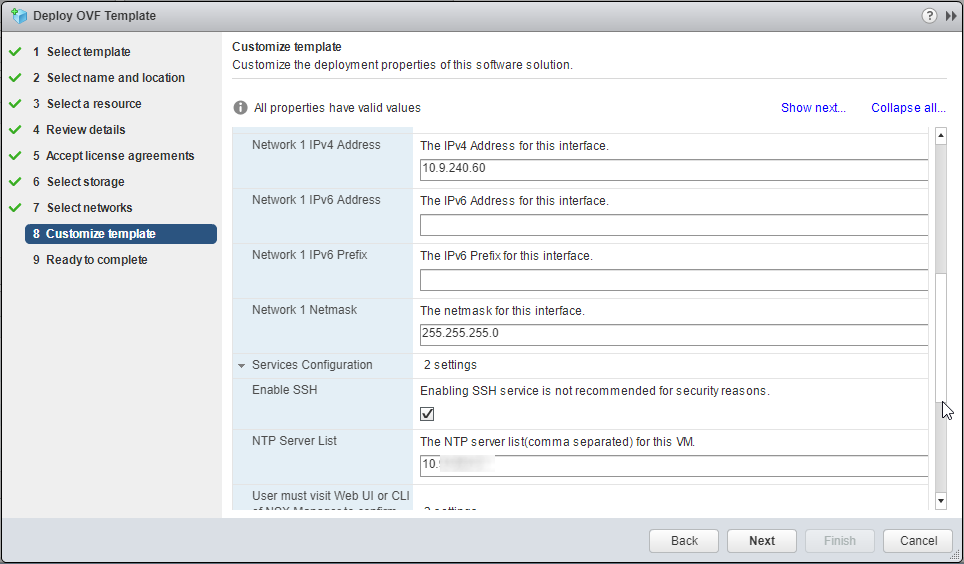
- Customization – the order is confusing a little bit…
enter the values for:- DNS
- Domain Search List
- IPv4 Gateway
- Hostname
- IPv4 Address
- Network 1 Netmask
- SSH enabled/disabled
- NTP
- Password for admin
- Password for Privilege Mode
- VMWare CEIP yes/no

- After that review you settings and click on Finish

- Wait until the VM is deployed. Then power on the NSX Manager.

Connect to vCenter
- After the NSX Manager is up and running, log into it. https://nsxmgr
Username: admin
Password: *****

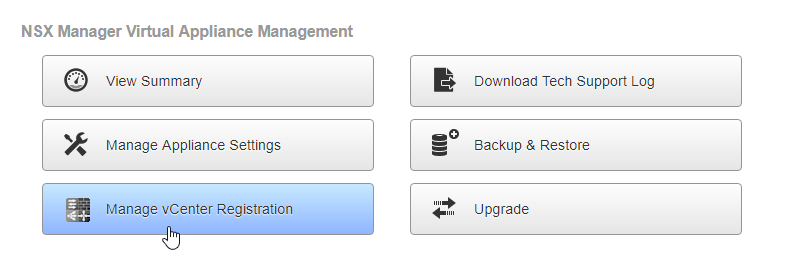
- Select Manage vCenter Registration
- Edit the Lookup Service URL

- Enter the URL of your vCenter Server and use the SSO Administrator Account.
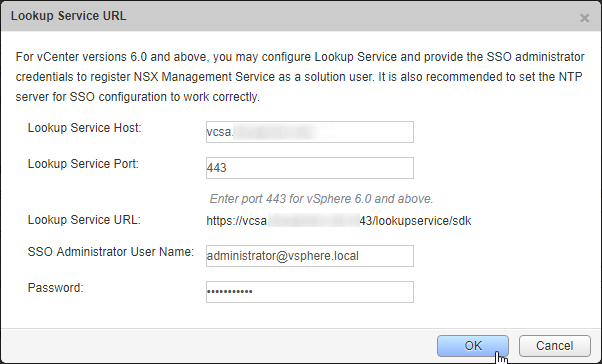
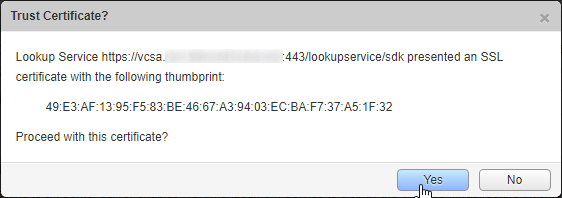
- Confirm the certificate trust.
- If everything works fine the status should show Connected with a green light

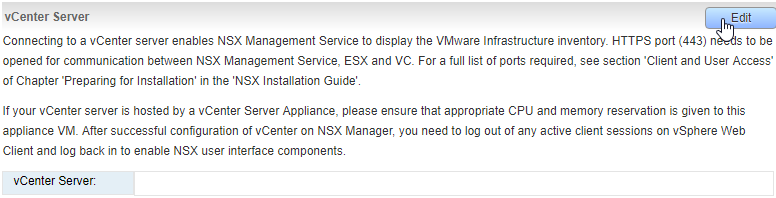
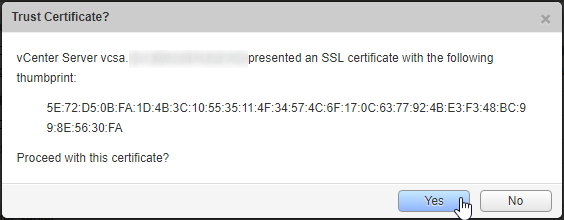
- Lets connect the vCenter server with the NSX Manager. Click on Edit for vCenter Server
- Enter the FQDN of your vCenter and the Credentials of your administrator.
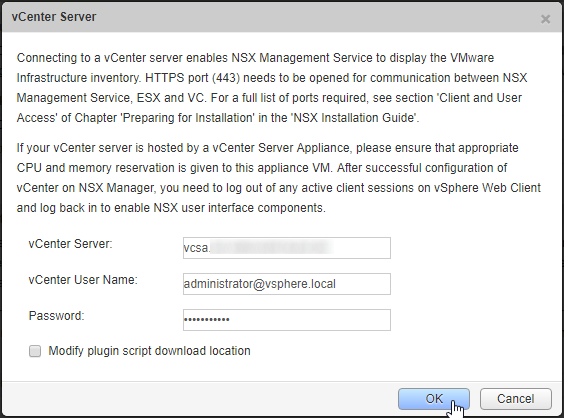
- Trust the Certificate too
- After that the second status should show connected too. By using the refresh button behind Last successful inventory update the status shows a timestamp.

Check Installation
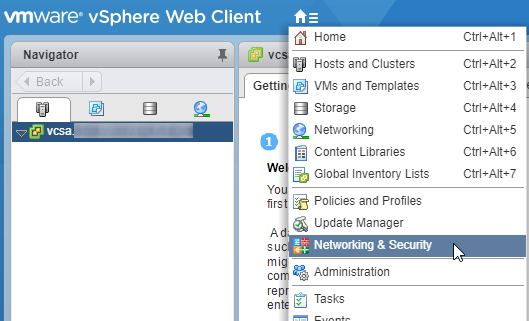
- If you are logged into your vSphere WebClient – logoff and login again.
- You will see a new point Networking & Security – select it
- The Dashboard shows connection of NSX Manager is ok (green)
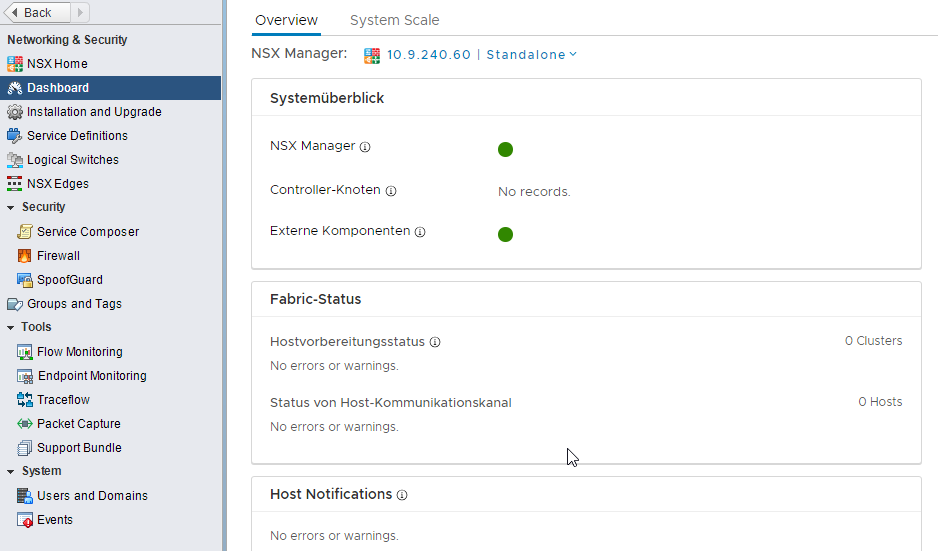
The deployment and integration of NSX Manager is complete. Next steps will be the deployment of three controller VMs.
Leave a Reply